Friday, June 29, 2012

Peaceful Pond

I pulled out another card from my pre-blog stash for today's post.  I made this for my Grandmother's 90th birthday back in March.  It uses two of my favorite techniques, emboss resist and brayering.  I honestly don't know what I did before I discovered Versamark, clear embossing powder, and my brayer! LOL
Because this card dates to before I began my blog, I didn't keep track of all the materials that went into making it.  I'll do my best to rememeber but I might miss a few...

Supplies:

Stamp sets: Fabulous Florets, Every Moment (retired)
Cardstock: Whisper White, Crumb Cake, Pretty in Pink textured, Paisley Petals DSP (retired)
Ink: Basic Black, Blushing Bride (retired), Baja Breeze, Crumb Cake
Accessories: Versamark pad and marker, clear embossing powder, Crumb Cake, Early Espresso, Baja Breeze, Pumpkin Pie, Certainly Celery, Old Olive markers, white gel pen, sponges, brayer, 3/16" corner punch, Modern Label punch, snail adhesive, Stampin' dimensionals

Began by pressing the bird and leaves into Versamark then Basic Black ink, stamped onto Whisper White cardstock, clear embossed, then heat set.  I colored in the bird and leaves then colored over them with a Versamark marker, clear embossed and heat set again.  Brayered Blushing Bride on the upper 3/4 of the sky then Baja Breeze on the bottom 1/4 to create the water.  Sponged Crumb Cake on all edges and beneath the leaves.  Finished by adding ripples to the water with a white gel pen.

Have a great, safe long weekend everyone!  I'm off to get my laundry done and house cleaned so I can enjoy the hot days ahead!! 

Thanks so much for looking!
webbanner-002copy Pin It

Thursday, June 28, 2012

Sweet Pea Sympathy


I found a really simple technique on making paper sweet peas on fellow demonstrator Judy Mashall's  blog; a link to her tutorial can be found HERE.  In short you punch a butterfly from cardstock, dampen it with water then crumple and unfold; re-shape it then set aside to dry.  The buds are made with half a butterfly.  The green buds of the flowers are made from sections of a scallop circle punch.  I glued everything together with Tombow and adhered them to the card with sticky strip to ensure they wouldn't fall off.  I will definitely try to make them again - I think my folding technique could use a little practice.

Supplies:

Stamp sets: Thoughts and Prayers
Cardstock: Whisper White, Pool Party, Primrose Petals, Always Artichoke, Rich Razzleberry, Pretty in Pink, Wisteria Wonder
Ink: Primrose Petals
Accessories: Primrose Petals satin stitched ribbon, Beautiful Wings embosslits (largest butterfly), scallop circle punch, Tombow liquid adhesive, sticky strip

Thanks so much for looking!
webbanner-002copy
Pin It

Wednesday, June 27, 2012

Garden Gate


I couldn't decide if I should even post this card or not.  I made it for Ryan's Grandmother's birthday which would have been today.  I began working on the card this past Saturday afternoon and finished it on Sunday.  We found out that night that she had passed away. 
After some thought I decided that even if she wouldn't be able to see it, I should still share the card on my blog to be enjoyed.  I'll probably never part with this card but at least this way I'll feel as though its been "given".  We'll miss you Nan; and don't worry, your still #1 Grandma :)

Supplies:

Stamp sets: Nature Walk, Stippled Blossoms, Create a Cupcake
Cardstock: Whisper White, Pretty in Pink, Early Espresso, Berry Blossoms DSP (retired)
Ink: Pretty in Pink, Primrose Petals, Wisteria Wonder, Elegant Eggplant, Basic Black, Sahara Sand, More Mustard, Basic Gray, Always Artichoke, Early Espresso, Certainly Celery, Island Indigo
Accessories: Versamark, clear embossing powder, Soft Suede, Basic Gray, and Basic Black markers, Modern Label punch, sponges, white gel pen, snail adhesive, Stampin' dimensionals

The bird was stamped in Versamark then Basic Black ink, clear embossed then heat set.  I then stamped the flowers using the masking technique with post it notes.  The gate and stone walls are all free hand drawn with the color sponged in.

Thanks so much for looking
webbanner-002copy Pin It

Tuesday, June 26, 2012

My Digital Studio Wedding Scrapbook


Good morning everyone!  I haven't been able to spend a lot of time in my stamp room over the last week or so - the weather has been just been too beautiful to stay indoors.  I've been going through some pre blog samples and have decided to share a few of those till I can get back to stamping.

I realized that although I've shared some My Digital Studio samples, they usually come in the form of hybrid samples.  So today I thought I'd share a page from our wedding scrapbook done completely in MDS.  I fully admit I'm not a scrapbooker in the physical glue and paper sense but boy oh boy digital scrapbooking has me hooked!!  With a program like this the possibilities are endless - I can't wait for the release of MDS 2 to check out all the new features!


Thanks so much for looking!

webbanner-002copy Pin It

Friday, June 22, 2012

Stained Glass Technique


Happy Friday everyone!  I haven't had a lot of time to create over the last few days so I'm sharing a card I made for a card class a few months ago.  It uses a really pretty technique called Stained Glass. 

Its a simple technique; stamp your image in Versamark then black ink onto vellum paper.  Cover with clear embossing powder and heat set.  Flip the vellum over to work on the reverse side and then with either blender pen and ink pads or write markers, color in your image.  Layer your image on neutral cardstock before applying to your project.  It really does look like stained glass when your done!

Supplies:

Stamp sets: Greeting Card Kids
Cardstock: Whisper White, Vellum, Calypso Coral, Baja Breeze
Ink: Basic Black
Accessories: Versamark, clear embossing powder, Calypso Coral, Early Espresso, Blush Blossom, Real Red markers, Fashionable Hearts embosslit folder, Square lattice embossing folder, corner punch, Everyday Enchantment Calypso Coral ribbon and brads, snail, tombow liquid adhesive

Thanks so much for looking!
webbanner-002copy Pin It

Thursday, June 21, 2012

Solitude


So I decided maybe if I stamped a summer scene or two summer might magically appear around here.  Let's see if it works ;)  This card is done entirely with masking, sponging, and a little direct to paper, with the exception of the tree, from the new Serene Silhouettes set. 

Supplies:

Stamp sets: Serene Silhouettes, Thoughts and Prayers
Cardstock: Whisper White, More Mustard, Cajun Craze, Baja Breeze, Basic Black
Ink: Sahara Sand, Pumkin Pie, Daffodil Delight, Cajun Craze, Early Espresso, Baja Breeze, Basic Black
Accessories: sponges, Basic Black marker, Stampin dimensionals, snail

Begin by masking off the mountains in the foreground with post it notes torn to shape.  Sponge Sahara Sand, Pumpkin Pie, then Cajun Craze.  Using the side of the Early Espresso ink pad, swipe across the mountains in the foreground; this technique is called 'direct to paper'.  Remove masks and mask off the mountains in the distance and sponge with Sahara Sand, Pumpkin Pie, and Early Espresso.  To create the sky sponge Cajun Craze along the horizon line, Pumpkin Pie above, blending the colors as you work upwards.  Follow with Daffodil Delight, then Baja Breeze at the top of the sky.  Stamp tree on mountain in the foreground in Basic Black ink.  Add birds with the fine tip of a Basic Black marker. The edges of the scene were lightly sponged with Basic Black ink.

Thanks so much for looking!
webbanner-002copy
Pin It

Wednesday, June 20, 2012

Together Forever


What a crazy kinda day.  We awoke this morning to no power and because we live on a rural acreage, no power means no water (and maybe more importantly, NO COFFEE) LOL.  It was almost noon by the time everything came back on! Anyway, here I sit at 5pm doing what I normally would do during my morning coffee :)

I thought I'd share the card I made for my parent's 34th Anniversary from this past weekend.  It uses the Iris Fold technique.  I found the folding pattern for the heart somewhere on the web quite some time ago; I just can't remember where.  There are tons of free pattern sites if you google 'iris folding'.  The silhouette of the hands was drawn freehand and cut out on Basic Black cardstock.

Supplies:

Stamp sets: Fast and Fun Notes (retired)
Cardstock: Cherry Cobbler, Island Indigo, Basic Black, Everyday Enchantment DSP
Ink: Basic Black
Accessories: Modern label punch, Fashionable hearts embosslits, rhinestones, Scallop edge punch, corner punch

Thanks so much for looking! 
webbanner-002copy Pin It

Tuesday, June 19, 2012

Take Care Butterfly


This card was inspired by a similar one done by fellow demonstrator Rita Wright.  A link to her blog can be found HERE.  I loved the way she "hid" the butterfly among the flowers; I think it adds a little surprise to the card.  This card also uses a technique called bleaching.  Here's a quick overview on how I made it.  The finished card measures 4 1/2" x 5 1/4".

Supplies:

Stamp sets: Elements of Style, Take Care
Cardstock: Calypso Coral, Subtles Designer Series Paper pack
Ink: Calypso Coral
Accessories: Beautiful Wings embosslits, Designer Frames folders, Versamark, clear embossing powder, Modern Label punch, household bleach, fine tip paintbrush

Begin by loading your stamp with Versamark then stamping on colored cardstock.  I used the flower from the Elements of Style set.    After stamping image cover with clear embossing powder and heat set.  Repeat process on another piece of cardstock for the butterfly.  Using household bleach and an aquapainter or fine tipped paint brush begin carefully painting within the edges of the image.  The cardstock will slowly begin to fade color; in some cases the area may have to be gone over more than once to reach the desired result.

After bleaching both pieces, I added the Designer Square Frame to my base cardstock using the Big Shot machine.  I placed it off center on my card just to add some interest.  With your second piece of bleached cardstock, cut out the largest butterfly from the Beautiful Wings embosslit folder; taking care to line up the part of the image you would like punched out.  Adhere the butterfly with a glue dot, lining up the patterns on both pieces of cardstock.  Viola, your butterfly has all but "disappeared".

I finished my card using So Saffron DSP and Calypso Coral in alternating layers and used the modern label punch to add the Take Care sentiment from the set of the same name.

Tips:
  • Not all of Stampin' Up! cardstock will bleach white, some bleach a soft yellow; so take this into consideration before beginning. 
  • It should also be noted to choose an open image stamp to gain the full effect of this technique.
Thanks so much for looking!
webbanner-002copy Pin It

Monday, June 18, 2012

Tree Top Lanterns

Monday again...and the middle of June to boot.  I finally got to play with a couple of new stamp sets this weekend.  I stared a long time at that circle with the butterflies and flowers from the Serene Silhouette stamp set wondering what it could be LOL.  I decided they looked a little like patio laterns.  So I "lit" them up with a So Saffron marker and hung them from the tree found in the new Take Care set.  The finished card measures 5 3/4" x 5".

Supplies:

Stamp sets: Serene Silhouettes, Take Care
Cardstock: Whisper White, Calypso Coral, Baja Breeze, Summer Smooches Designer Series Paper
Ink: Island Indigo, Not Quite Navy, Basic Black, Calypso Coral
Accessories: Labels Collection Framelits (2 largest frames), Versamark, clear embossing powder, So Saffron marker, 1/2" circle punch, 3/4" circle punch, Beautiful Wings embosslits, white gel pen, brayer

Thanks so much for looking!

webbanner-002copy
Pin It

Friday, June 15, 2012

Some Turkey Love for Daddy

From the moment our oldest son Griffin was born Ryan called him 'turkey'.  So when I stumbled across these adorable punch art turkey's made using a scallop circle and modern label punches, I knew I had to incorporate them into this years Father's Day card.  I used much the same concept and layout as I did on my own Dad's Father's day card...a camouflage background and a written message on the boy's feet.  Sawyer has terribly ticklish feet so I did my best to draw a heart on one foot and a "D" on the other...if you tilt your head from side to side you can make it out a little better LOL.  The tutorial to create the camouflage technique can be found HERE.

Supplies:

Stamp sets: Lovely as a Tree
Cardstock: Crumb Cake, Pumpkin Pie, Cherry Cobbler, Cajun Craze, More Mustard, Always Artichoke, Early Espresso, Not Quite Navy
Ink: More Mustard, Always Artichoke, Early Espresso, Old Olive, Soft Suede
Accessories: Early Espresso marker, white gel pen, Basic Black marker, Naturally Serif die, snail adhesive

Thanks so much for looking! 

webbanner-002copy Pin It

Thursday, June 14, 2012

Three Busy Beavers for Papa


I think I may be stuck on the camouflage theme for Father's Day this year...oh well, it suits them!  This is the card I made for my dad.  The concept was to spell 'Papa' on the bottom of the grandkids feet.  Sounds simple...till you actually try to line up a 3 month old, 8 month old, and 2 year old for a picture opp of their feet!  We ended up taking the pictures individually then merging them filmstrip style.  Not quite what I envisioned but its the idea that counts and all in all I'm happy with the results.  I know its a little hard to see in the picture but their feet read 'heart P-A-P-A heart'.

The beavers are made with the owl punch; their tails with the large oval punch then scored with the Simply Scored tool.  The cards background is stamped with my camouflage technique.  To see a full tutorial on the camouflage technique, click HERE.

Supplies:

Stamp sets: Lovely as a Tree, Teeny Tiny Wishes
Cardstock: Crumb Cake, Soft Suede, Early Espresso, Basic Black, Whisper White, Pretty in Pink, Sahara Sand
Ink: Basic Black, Soft Suede, Early Espresso, Old Olive
Accessories: Owl punch, Large Oval punch, Modern Label punch, Simply Scored scoring tool, Early Espresso marker, white gel pen, sponges

Thanks so much for looking!

webbanner-002copy Pin It

Wednesday, June 13, 2012

Origami Shirt Cards


Sticking with the Father's Day theme this week I thought I'd show you the cards I made last year for my Dad and Father-In-Law.  Aren't they super cute??  They are really easy to make; especially if you use the Simply Scored scoring tool (item#122334) for all your fold lines.  Plus the top of the shirt flips down to put a sentiment inside! 

It should be noted that this project is really designed to use Stampin' Up! Designer Series Papers - I attempted to make the Saskatchewan Roughrider card from cardstock but it just doesn't fold as crisply as the DSP does.

I used a template from fellow Stampin' Up! demonstrator, Marie Shaughnessy.  A link to her awesome, step by step tutorial can be found HERE.

Supplies:

Stamp sets: none
Cardstock: Garden Green, Whisper White, Build a Bear Pawsitively Prints (retired)
Accessories: Brights Designer buttons, Basic Black marker, snail, Tombow adhesive

Thanks so much for looking! Oh and....

(GO RIDERS!!!  CFL pre-season game tonight!!) :)

webbanner-002copy


Pin It

Tuesday, June 12, 2012

Camouflage Fishing Vest


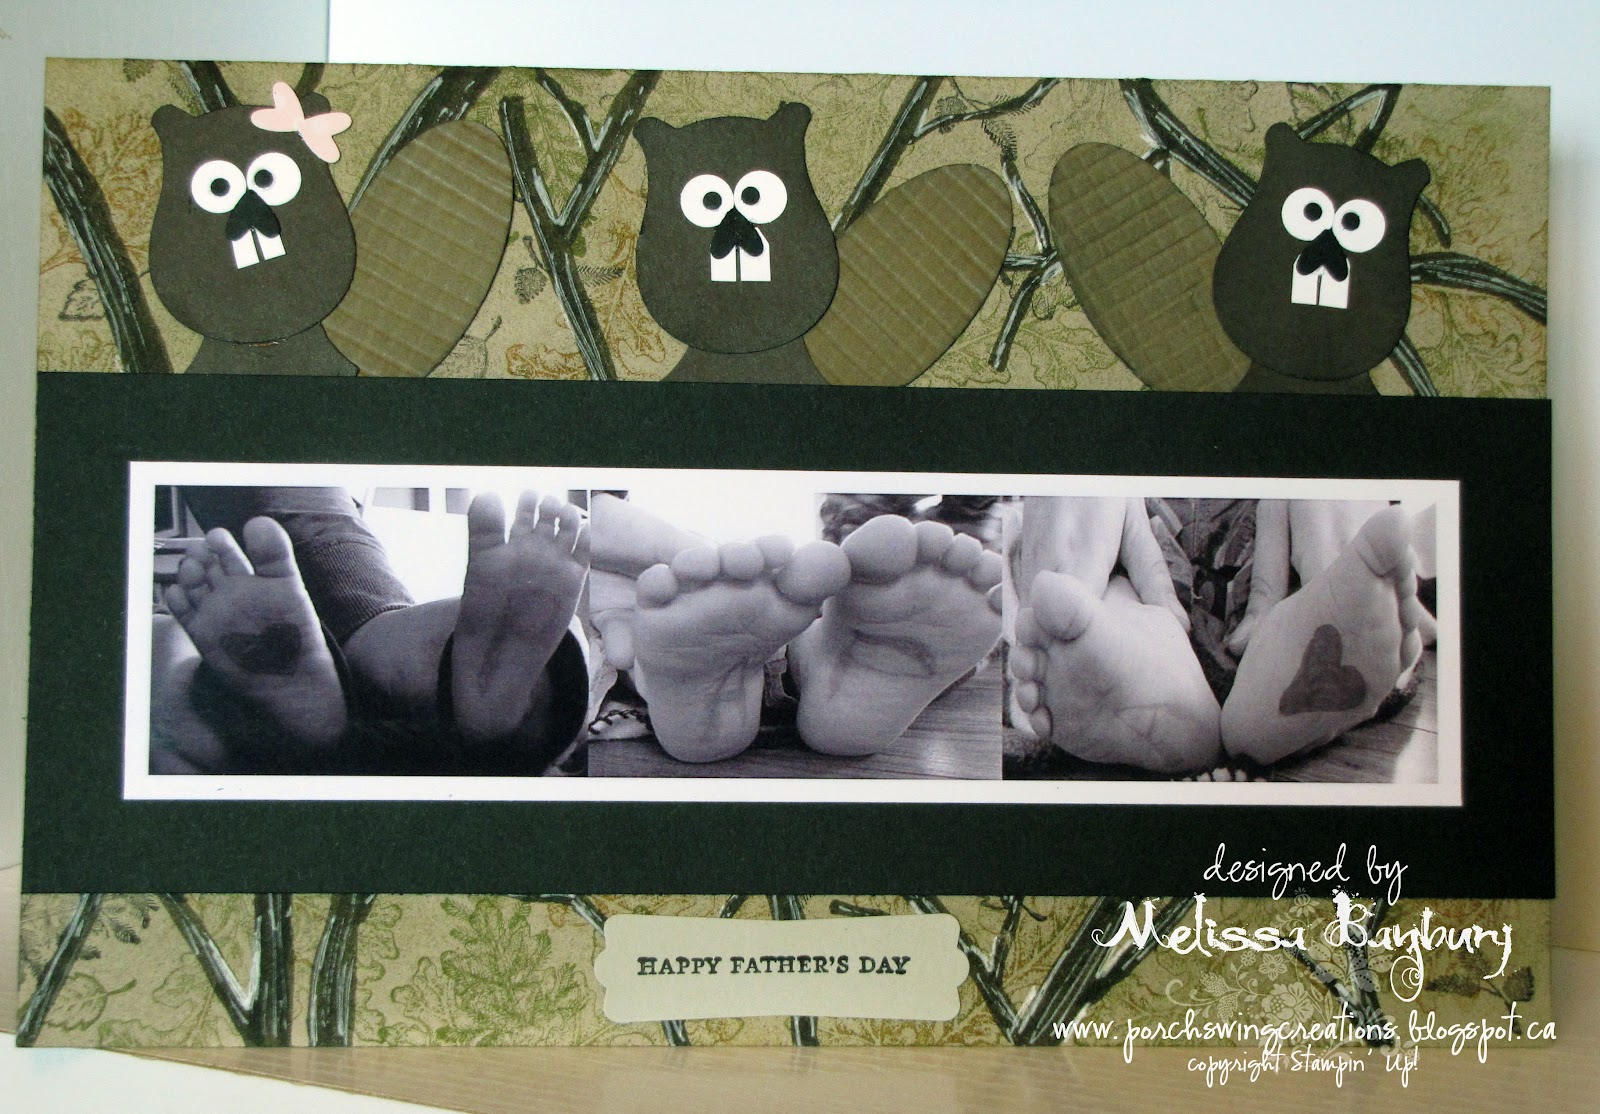
Last week I realized that I hadn't tackled any of the 3 Father's Day cards I need to make.  This week I'll share what I've come up with for each of the special men in my life :)

I'd seen a few of these vest type cards on my internet travels and thought it would be a great idea for my Father-In-Law.  When I showed an example to my husband he said 'ya that would work but a camo vest would be so much better'...ugh I thought; how am I going to re-create camouflage??  So I pulled out one of my son's jackets as inspiration and went to work.  Follow along and I'll show you how.

Supplies:

Stamp sets: Lovely as a Tree
Cardstock: Crumb Cake, Whisper White, Soft Suede
Ink: Old Olive, Soft Suede, Early Espresso
Markers: More Mustard, Early Espresso, Old Olive
Accessories: Simply Scored scoring tool, white gel pen, sticky strip, snail, piercing tool, metallic brads


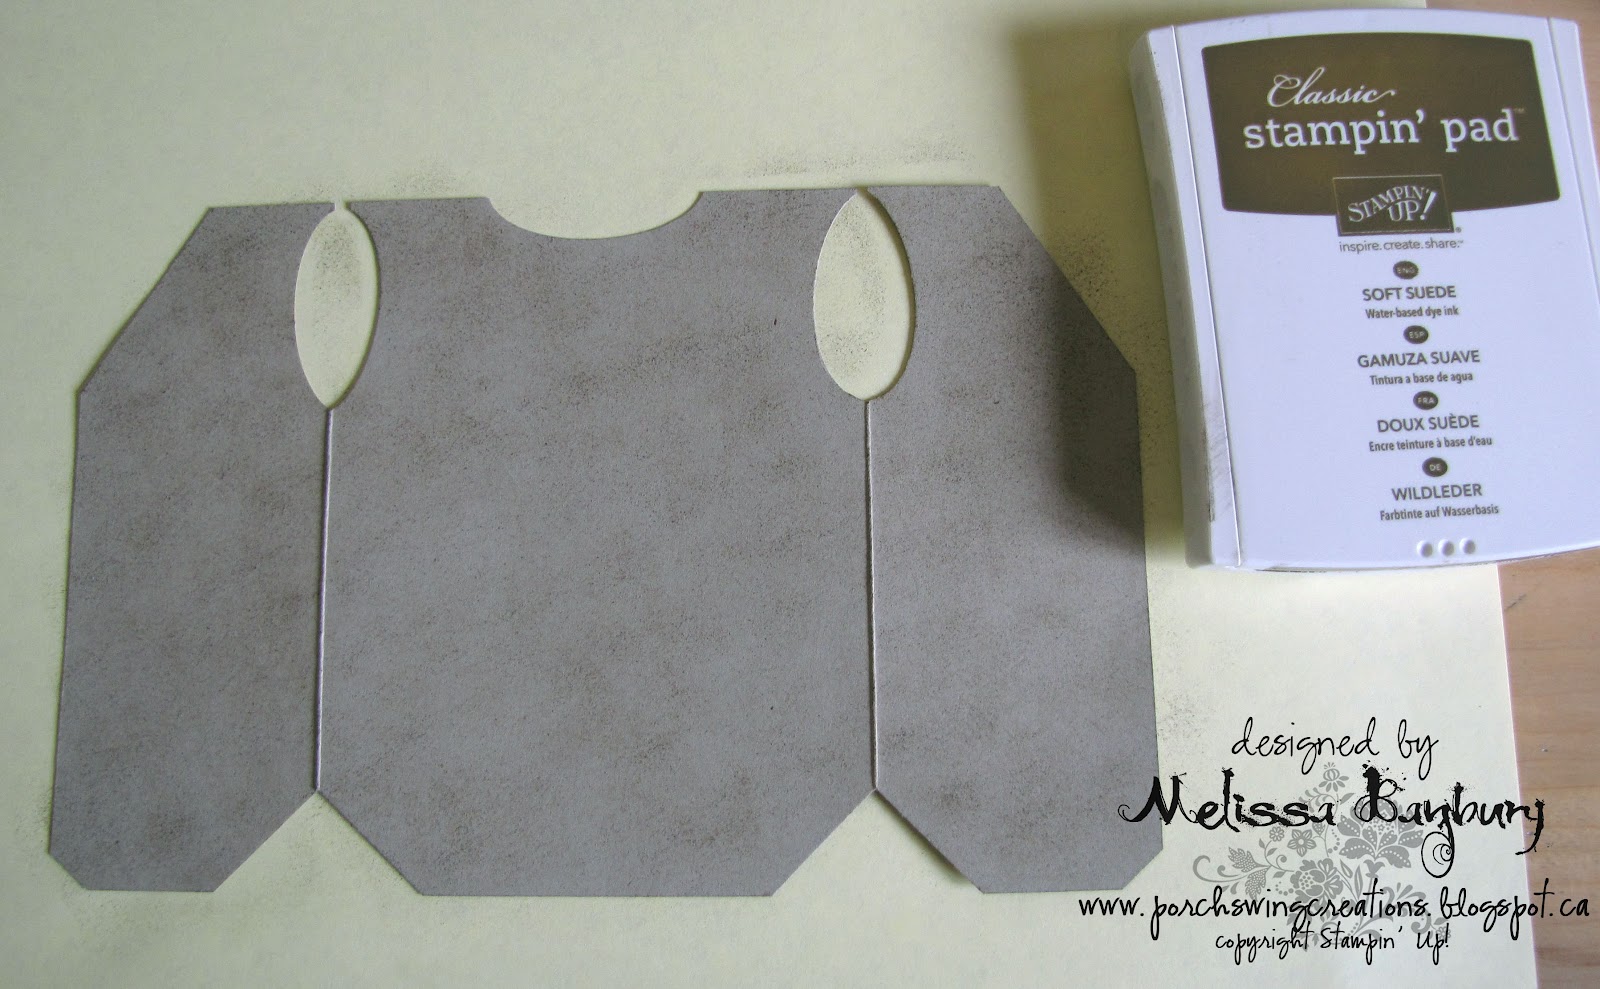
Cut a sheet of Crumb Cake cardstock to 5 1/2" x 8 1/2".  Score on the landscape side at 2 1/8" and 6 3/8" and fold inward.

While card is folded closed measure 3/4" in along the bottom from the fold line as well as vertically on the fold line and make a light pencil mark.  Do this on the bottom of both sides of the card.

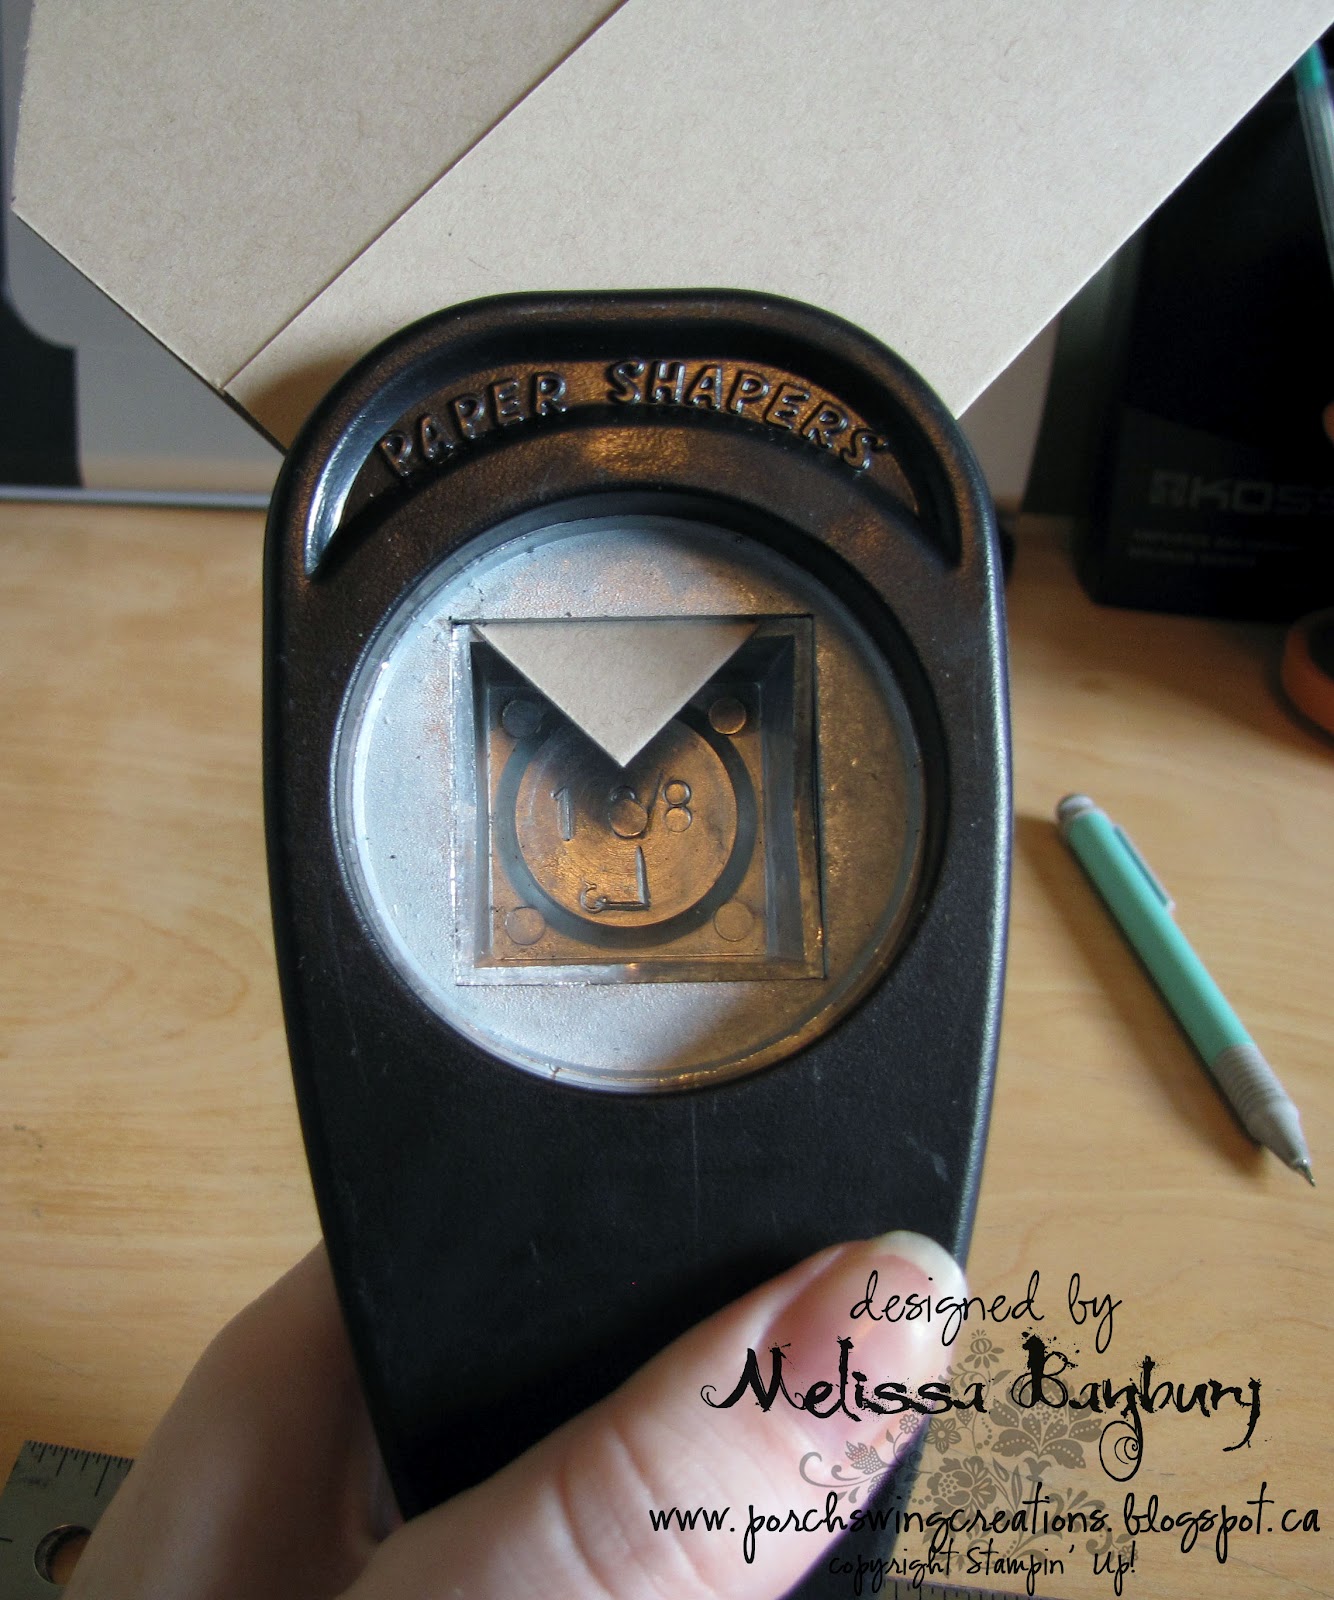
Using a square punch or paper cutter, line up mark lines and punch through both layers of paper.  Do this on both sides.

Turn the card to work on the top portion; we'll now be making the collar of the vest.  From the flaps measure 1" out on both sides.  Measure 1 1/2" vertically from the top of the card down.

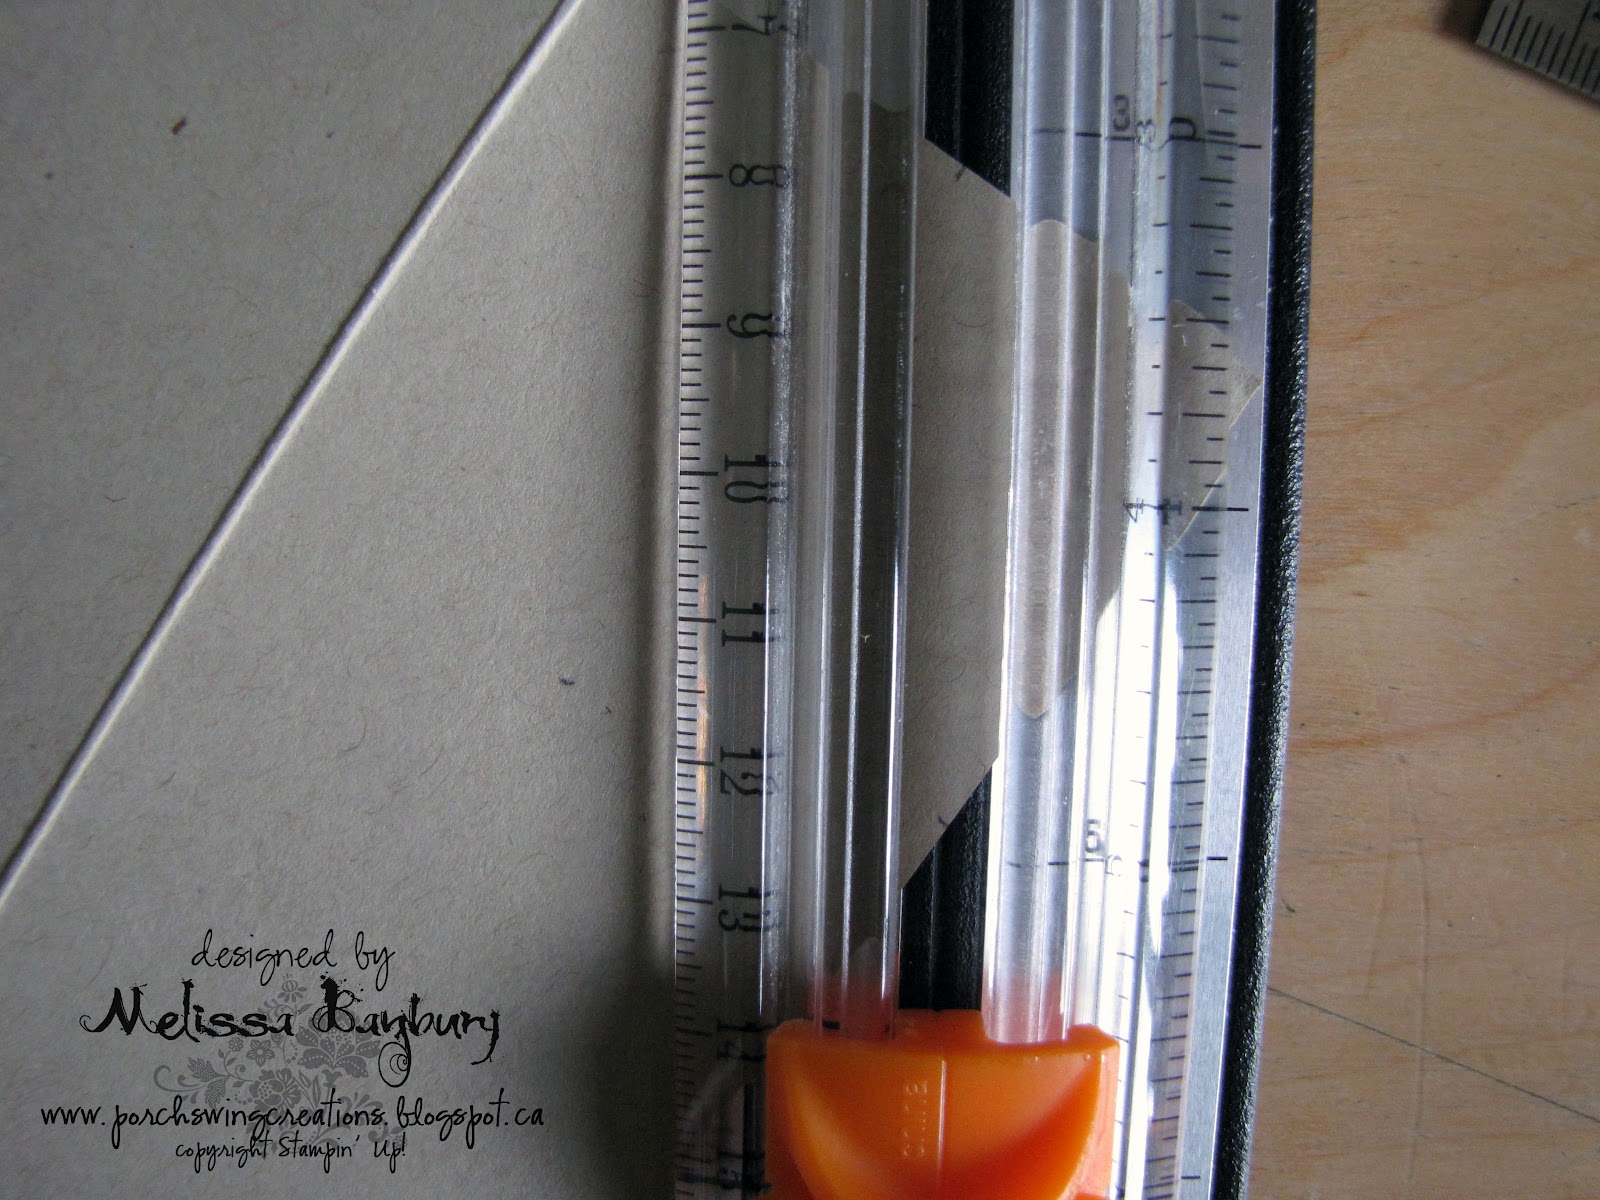
Open the card to cut on each flap individually.  Line up the two measurements on the paper cutter and cut.  Repeat on other side.

Create the armholes using a wide oval punch; cutting through both layers of cardstock.  The back portion of the neckline was made with the wide oval punch as well.  The bottom center "V" of the vest was made by only cutting through the top of the cardstock measuring in along the bottom 1/4" and vertically 1/4".

Cut pockets from Crumb Cake cardstock.  Two pockets were made with a 1 3/8" square punch, with the corners cut on an angle of 1/4".  The other two pockets measure 1 1/2" x 1 1/4", with the corners cut on an angle of 1/4".

Lightly sponge Soft Suede on the outside of the vest and 4 pockets (not pictured)

Lightly sponge Early Espresso on top of the Soft Suede on vest and pockets.

Lightly sponge over the previous colors with Old Olive.

Using select stamps from the Lovely as a Tree stamp set randomly stamp images across the vest and pockets (not pictured).  In this instance I used the oak leaves, the 2 small leaf stamps, and the upper portion of the evergreen tree.  Stamp using More Mustard, Old Olive, and Early Espresso inks. 

Next using an Early Espresso marker, randomly draw branches on vest and pockets.  After drawing the branches, highlight with a white gel pen.

Cut pocket trim pieces, collar trim, and button flaps from Soft Suede cardstock. 
Sizes as follows:
Pocket trim - 2 @ 3/8" x 1 3/8", 2 @ 3/8" x 1 1/2"
Collar trim - cut a rectangle 3/4" x 2".  Cut the rectangle in half on the diagonal (corner to corner)
Button flaps - 1/4" x 3/4"
Using Early Espresso ink, sponge edges of all pieces

Assemble card.  Pocket trim and collar were glued on with liquid glue (Tombow).  Pockets and button flaps were adhered with sticky strip.  Two small metallic brads were added to the button flaps using a piercing tool.  Faux stitching was added to the pockets with an Early Espresso marker.  A small piece of Whisper White cardstock was added inside the card for the sentiment; to make it look like a t-shirt use a wide oval punch to create the neckline.


Embellish with small fish hooks, adhering with stick strip. 

Safety Tip: I cut off the barbs with side cutters for safety before adhering the fish hooks to the card.

Thanks so much for looking!


webbanner-002copy
Pin It

Monday, June 11, 2012

...and they rode off into the sunset


This past weekend Ryan and I were invited to celebrate the marriage of two close friends, Rodney and Lindsey.  Their actual wedding ceremony took place in January in the beautiful Canadian Rockies but they decided to wait for warmer weather to have their reception :)  It was a fabulous time and a perfect fit to their wild, carefree character - jeans, hoodies, beverages, a bonfire, and wonderful friendship. 

I wanted to make a wedding card that was fitting to their personalities - no lace, frills, or foo-foo for this couple!! LOL  The mountains are meant to represent where they were married and, because they both love to ride, the motorcycle stamp in My Digital Studio seemed the perfect addition to this landscape.  The inside sentiment reads "...and they rode off into the sunset and lived happily ever after...."  

Congratulations you two!!!!!  We wish you all the love and happiness in the world!!!

Supplies:

Stamp sets: Motorcycle (My Digital Studio)
Cardstock: Whisper White, Always Artichoke, Basic Black
Ink: Daffodil Delight, Pumpkin Pie, Cajun Craze, Basic Gray, Basic Black, Lucky Limenade, Old Olive, White Craft ink
Accessories: Real Red, Cherry Cobbler, Marina Mist, Pacific Point, Old Olive write markers, Versamark marker, clear embossing powder, white gel pen, brayer, sponges, Top Note die, metallic brads, 3/16" corner punch, snail adhesive, dimensionals

Thanks so much for looking!

webbanner-002copy Pin It

Friday, June 8, 2012

Night Lights on the River


I definitely challenged myself with this card!  The idea, I thought, was a great one.  Execution of what I seen in my head, not so simple LOL.  There is tons of masking, layering, and sponging in this one...my Stamp-a-ma-jig was smoking after I was all done! ;)

Supplies:

Stamp sets: Lovely as a Tree
Cardstock: Whisper White, Rich Razzleberry, Tempting Turquoise, Basic Gray
Ink: Daffodil Delight, Old Olive, Lucky Limenade, Tempting Turquoise, Rich Razzleberry, Not Quite Navy, Basic Black, Sahara Sand, Basic Gray, White craft ink
Accessories: Garden Green, Old Olive, Night of Navy, Basic Black write markers, white gel pen, Stamp-a-ma-jig, sticky strip, snail, Texturz plate #1 Flourish, 1/4" Rich Razzleberry grosgrain ribbon

If you would like to give a project like this a try here's what I did in a few quick steps:
  • mask off and sponge each rock individually, shading and highlighting as you go
  • mask off the rocks to work on the sky
  • sponge the sky randomly with Daffodil Delight, Old Olive, Lucky Limenade, Tempting Turquoise, Rich Razzelberry, Not Quite Navy, Basic Black to create the northern lights
  • turn the mask over to protect the bottom portion of the rock line and sponge the water using the same colors used in the sky
  • using a Stamp-a-ma-jig stamp the treeline
  • using a Stamp-a-ma-jig stamp the reflective treeline in the water
  • using markers in shades of green add grass along the rock line
  • with a white gel pen add stars, highlights in the trees and rocks, and water ripples.
Have a great weekend everyone!

webbanner-002copy Pin It

Thursday, June 7, 2012

Meadow Games


My oldest son Griffin loves loves loves being outside.  This card reminds me of him...right down to the ball being kicked into the flowers LOL.  This card does use a few retired products (insert hand slap here) but they are sets I just love and am not ready to part with just yet. :)

Supplies:

Stamp sets: Up in the Air (hostess-retired), sentiment made in My Digital Studio
Cardstock: Whisper White, Crumb Cake, Rich Razzleberry, Pool Party, Bashful Blue, Blushing Bride, Summer Smooches DSP
Ink: Crumb Cake, Island Indigo, Baja Breeze, Pretty in Pink, Pool Party, Pear Pizazz
Accessories: Build a Stocking punch (retired), Heart to Heart punch (retired), 1 1/4" circle punch, 1 3/8" square punch, assorted write markers, Island Indigo bakers twine, Versamark, clear embossing powder, white gel pen, piercing tool

The little boys shorts use a great technique I found called faux denim.  I'll be posting a tutorial on how to recreate this technique in an upcoming post. :)

Thanks so much for looking!

webbanner-002copy Pin It
Related Posts Plugin for WordPress, Blogger...