

Hi All!
This is a long time promised tutorial that I was finally able to complete! If you recall a while back I did a Spring Cottage Shelf Card for my Mom's birthday - I had a great response to the card with many of you asking for a template on how to make one for yourself. Since there isn't many other templates floating around on the web I thought I would share the one I came up with. Please keep in mind that it can always be tweaked and adjusted to fit your needs - its simply a jumping off point! For instance in the initial card I created I rounded the edges of the front of the card, here I didn't. My Spring Cottage card also used a lot of DSP, here I only used cardstock - and IT DOES make a difference to the assembly and stability of the card! (I'll get into more of that in the tutorial).
I've recently become a little obsessed with the idea of Fairies and Fairy Gardens (my Pinterest boards speak for themselves on this one!) so I thought I'd take this card in that direction. This tutorial doesn't cover how I made the elements of the Fairy house but if you should have any questions, please feel free to leave a comment or shoot me an email!
Let's get started! First you obviously need the template; click HERE to download the 3 page template. If you decide to make your card base all one color simply go ahead and print it directly on the cardstock and cut out the pieces. If you want to spice it up a bit and add different colors or DSP to your base, you have a couple of options.
- First option is to print directly onto the DSP and cut out - however be warned - DSP is much thinner than cardstock and doesn't retain its shape well as a card base. I would suggest to rather print onto heavier cardstock then overlay the piece with DSP
- Second option is to print the template onto computer paper then using tracing paper trace the template onto different colored pieces of cardstock and/or DSP. This option will most definitely save you paper in the end!
Onto the assembly:

For simplicity sake I printed out my entire card base from Always Artichoke cardstock for this card. You'll have 5 pieces ready for assembly at this point. If you are going to add DSP, trim or shape the front edges of the shelf layer, or do any shading along the edges with inks, do it at this point.
It should be noted that the template is designed for ONE LAYER of cardstock. If you add any other layers, you'll have to adjust the slits you cut in the shelf portion of the template to accommodate the thickness of the additional layers. This probably doesn't make sense at this point, but believe me it will be clearer when you begin assembling the pieces.

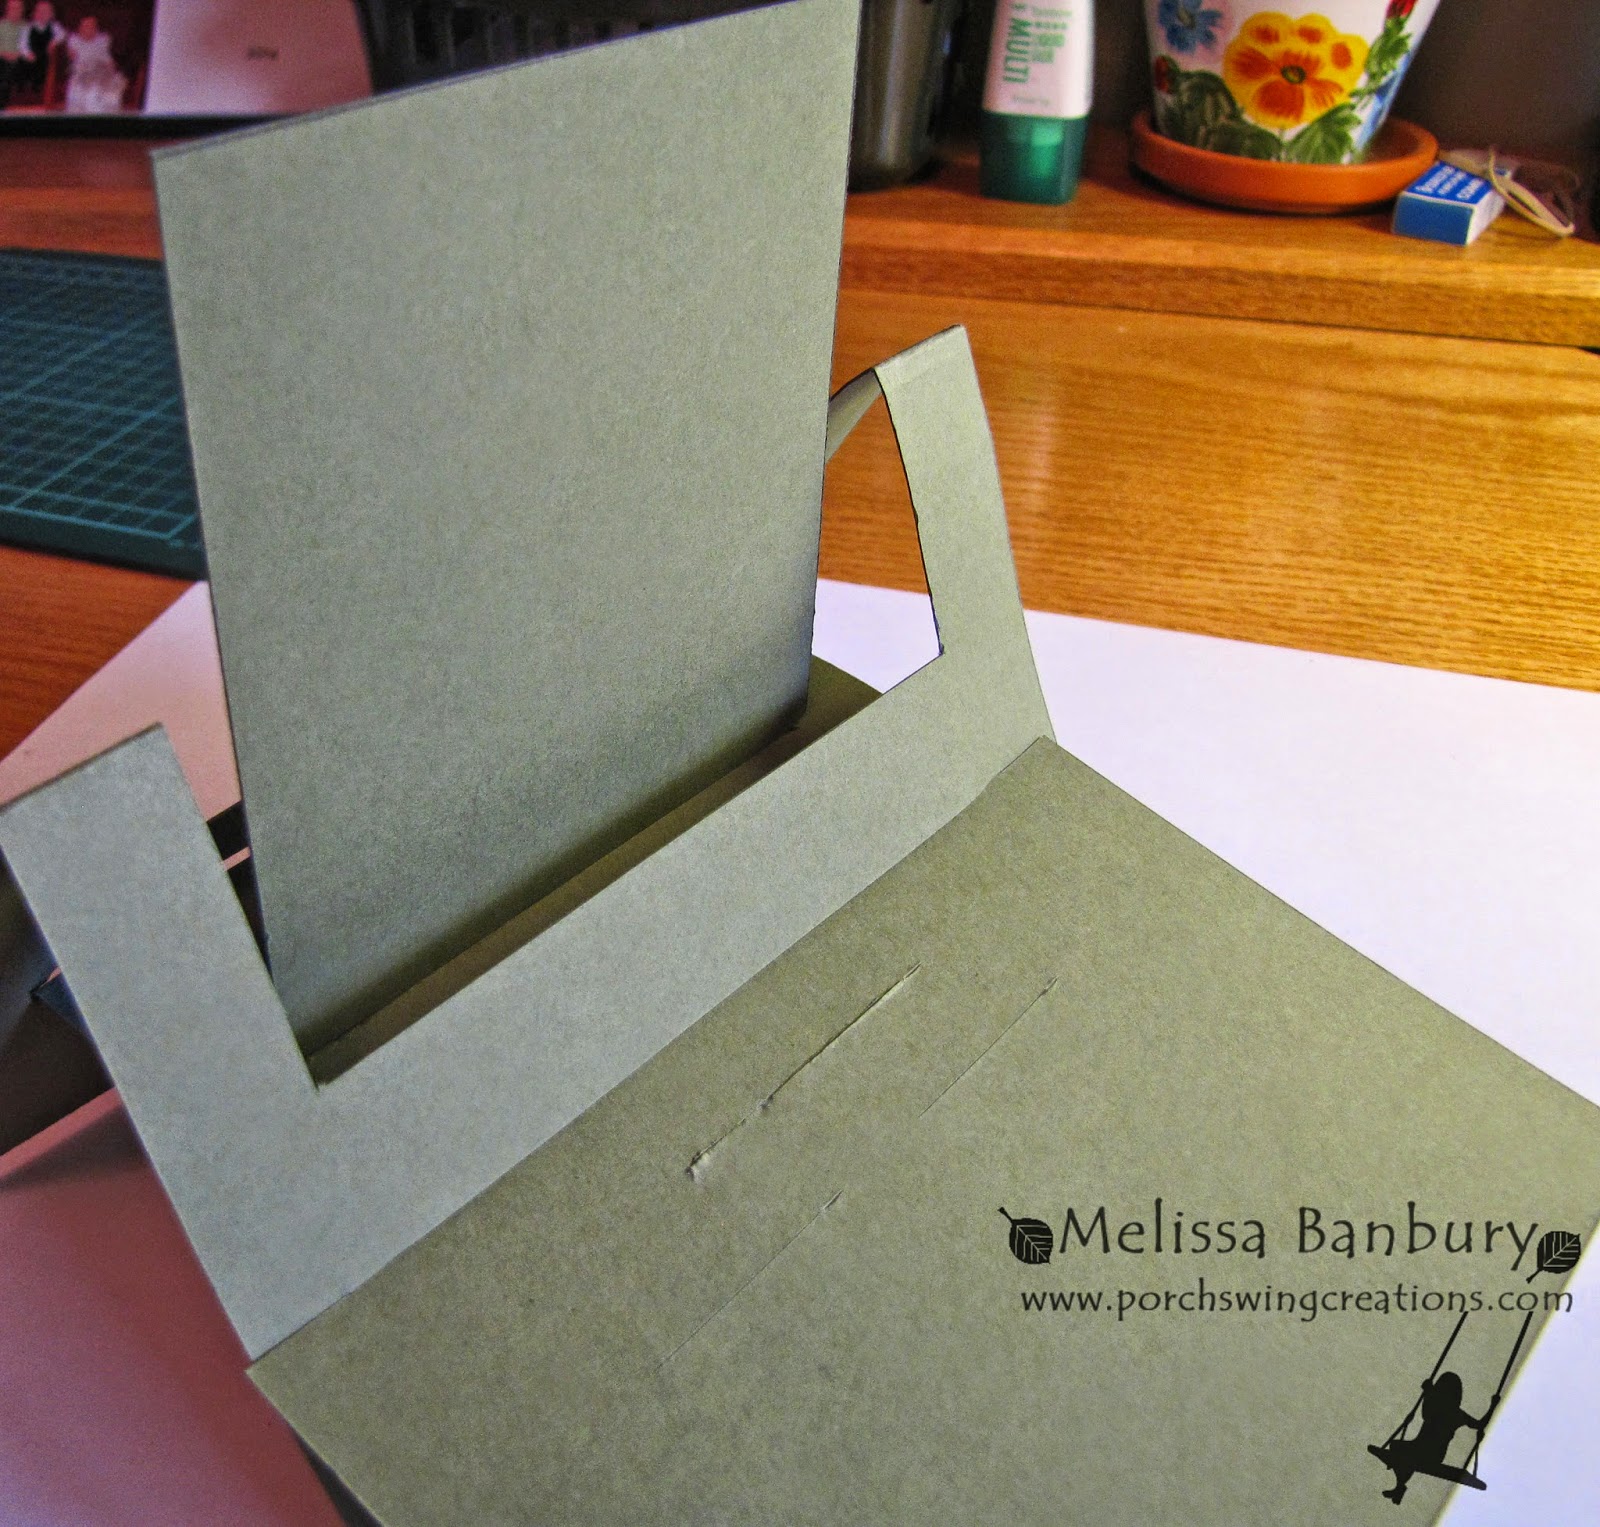
Begin by sliding the shelf portion of the template through the front slot on the card base.

Continue sliding the shelf through the back slot of the card base. You will have to GENTLY bend the tabs to get it through - if you need to cut the slot slightly wider go ahead. Glue the tab in place with your choice of either Multi-purpose glue or Sticky strip.
Slide the Back Layer into place in the slot in the middle of the card base. A couple of tips and tricks I've learned at this stage: If you cover this section with DSP, cover the entire section, not just the upper half. By just covering the upper half it makes this layer extremely top heavy and the card WILL NEVER stand (trust me on this one!). Second tip: it may seem necessary to cut the slit in the shelf layer wider to accommodate this piece fitting. I caution you to be careful if you do this - if the slit is cut too wide the layer will simply fall through the opening and therefore the card WILL NEVER stay upright (are you feeling my angst towards this layer yet??). It is by far the pickiest layer to contend with; if you get this one right, your home free!

Next, insert the Middle Layer into the second slot on the shelf layer portion. Fold the tabs back and slide downwards through the shelf layer. Once inserted the tab becomes a "U" shape below and helps to support the shelf of the card. Again it should be noted that if you add any other layers of paper you may have to clip the slot or trim the edges of the tabs. Adjust however you need to make sure your card stands properly.

Finally insert the Front Layer into the first slots on the Shelf Layer. You will need to insert these from the bottom of the card upwards through the shelf layer.

When your card is assembled it should look something like this. Now begins the fun part - decorating! And not to sound like a broken record but be mindful of how much you adorn the card base. The more you add the heavier the card becomes making it harder to stand properly. I've found adjusting the length of the shelf layer can help here - so if you feel the need to decorate in excess (as I often do) feel free to trim off a little if you need to!
Here is a few close ups of my finished card along with my supply list. Many elements are punch art, but I took the liberty of cutting a few things free hand as well.


Supplies:
Stamp sets: Hardwood
Cardstock: Always Artichoke, Soft Suede, Early Espresso, Old Olive, Real Red, Very Vanilla, Whisper White, Daffodil Delight, Smoky Slate
Ink: Early Espresso, Basic Gray
Punches: Cupcake, Large Oval, Extra Large Oval, 1/2" Circle, 3/8" Circle
Accessories: Fringe Scissors, Sponges, Dimensionals, Multi-purpose liquid adhesive, Early Espresso and Basic Gray markers, Large Pearls, Chevron Embossing Folder, Finishing Touches Edgelits

I hope you've enjoyed this tutorial! It's a bit of a tricky card fold to get the hang of at first but I promise you they do get easier to make if you persevere and make more than one! Save this card for someone special who will really appreciate the time you put into it because its definitely not your average card!
Have a wonderful day, until next time....


