Tuesday, March 31, 2015

Corner Garden One Layer Paper Tole


Hiya!

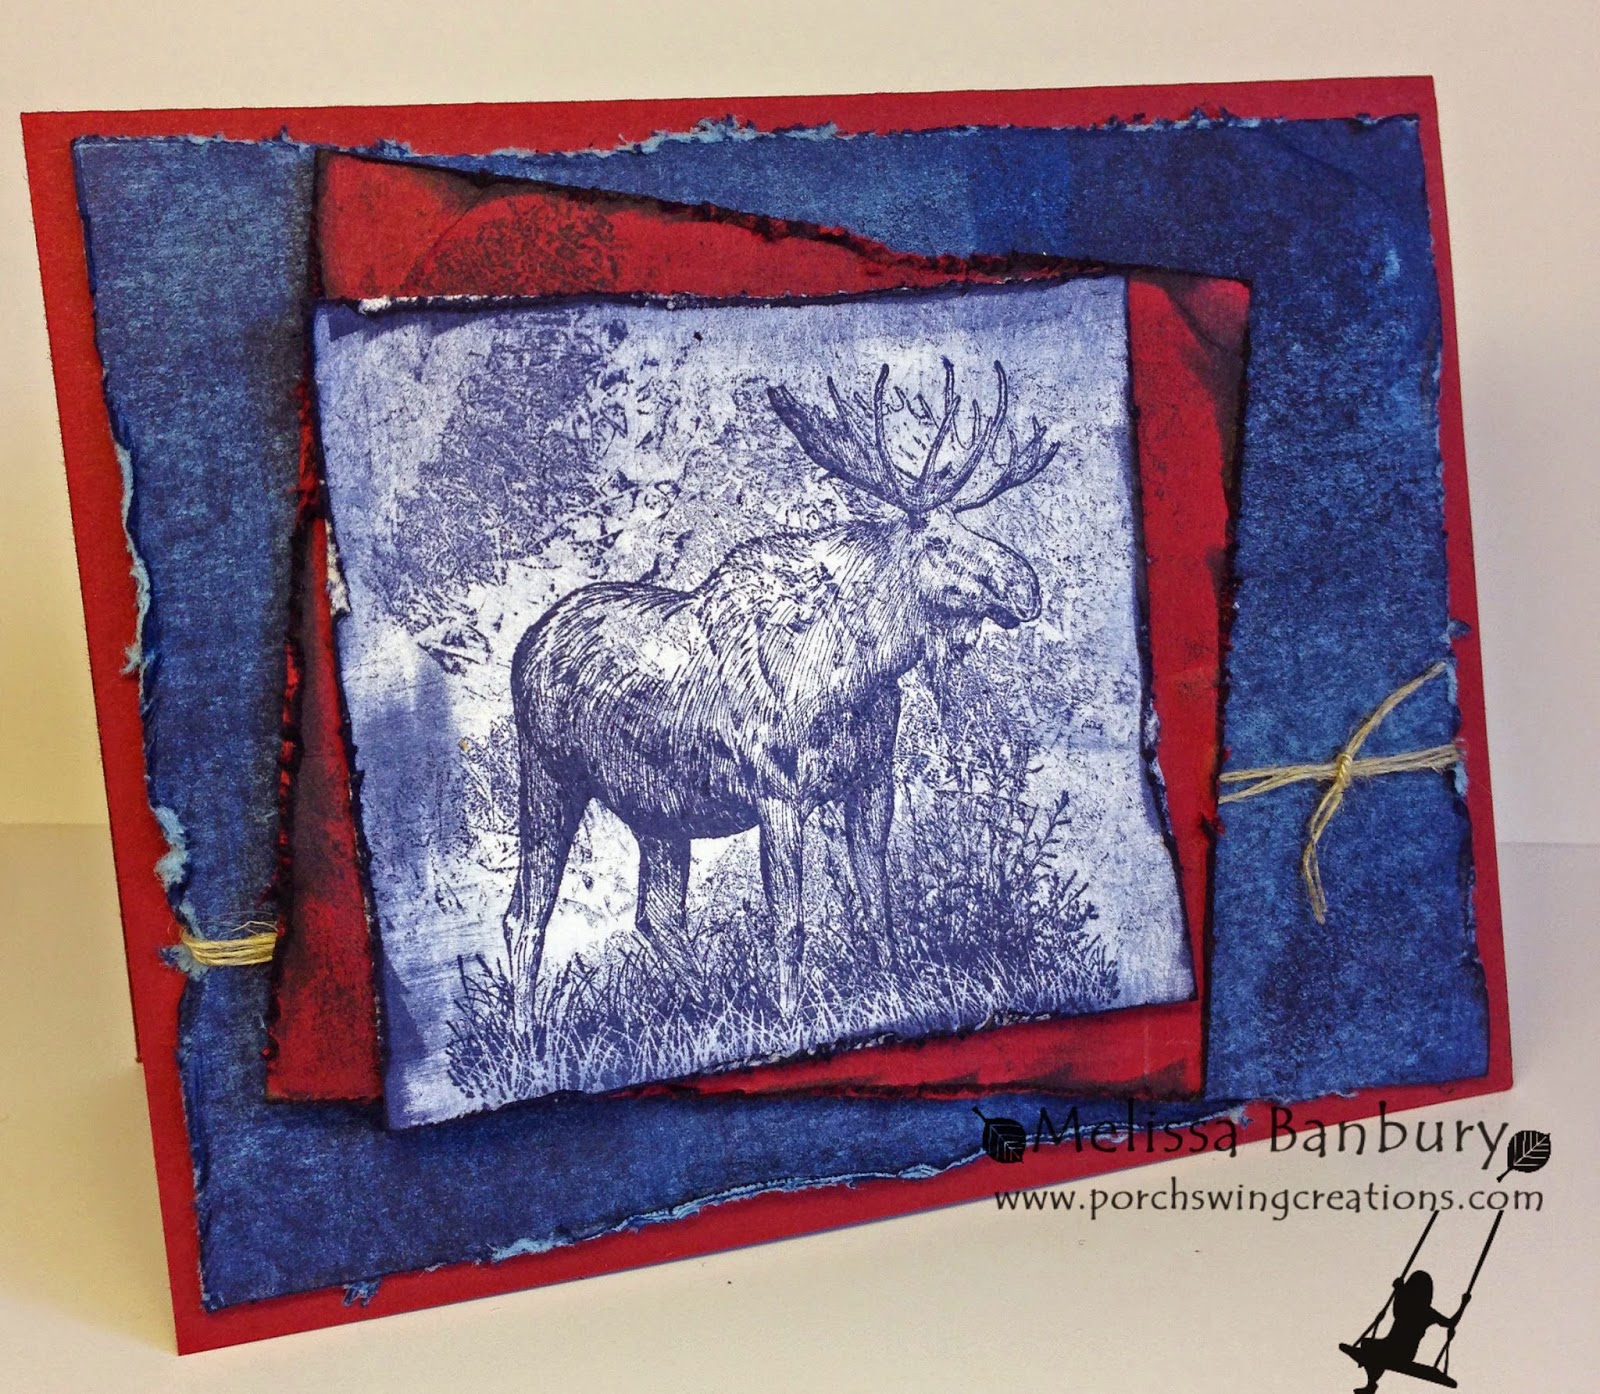
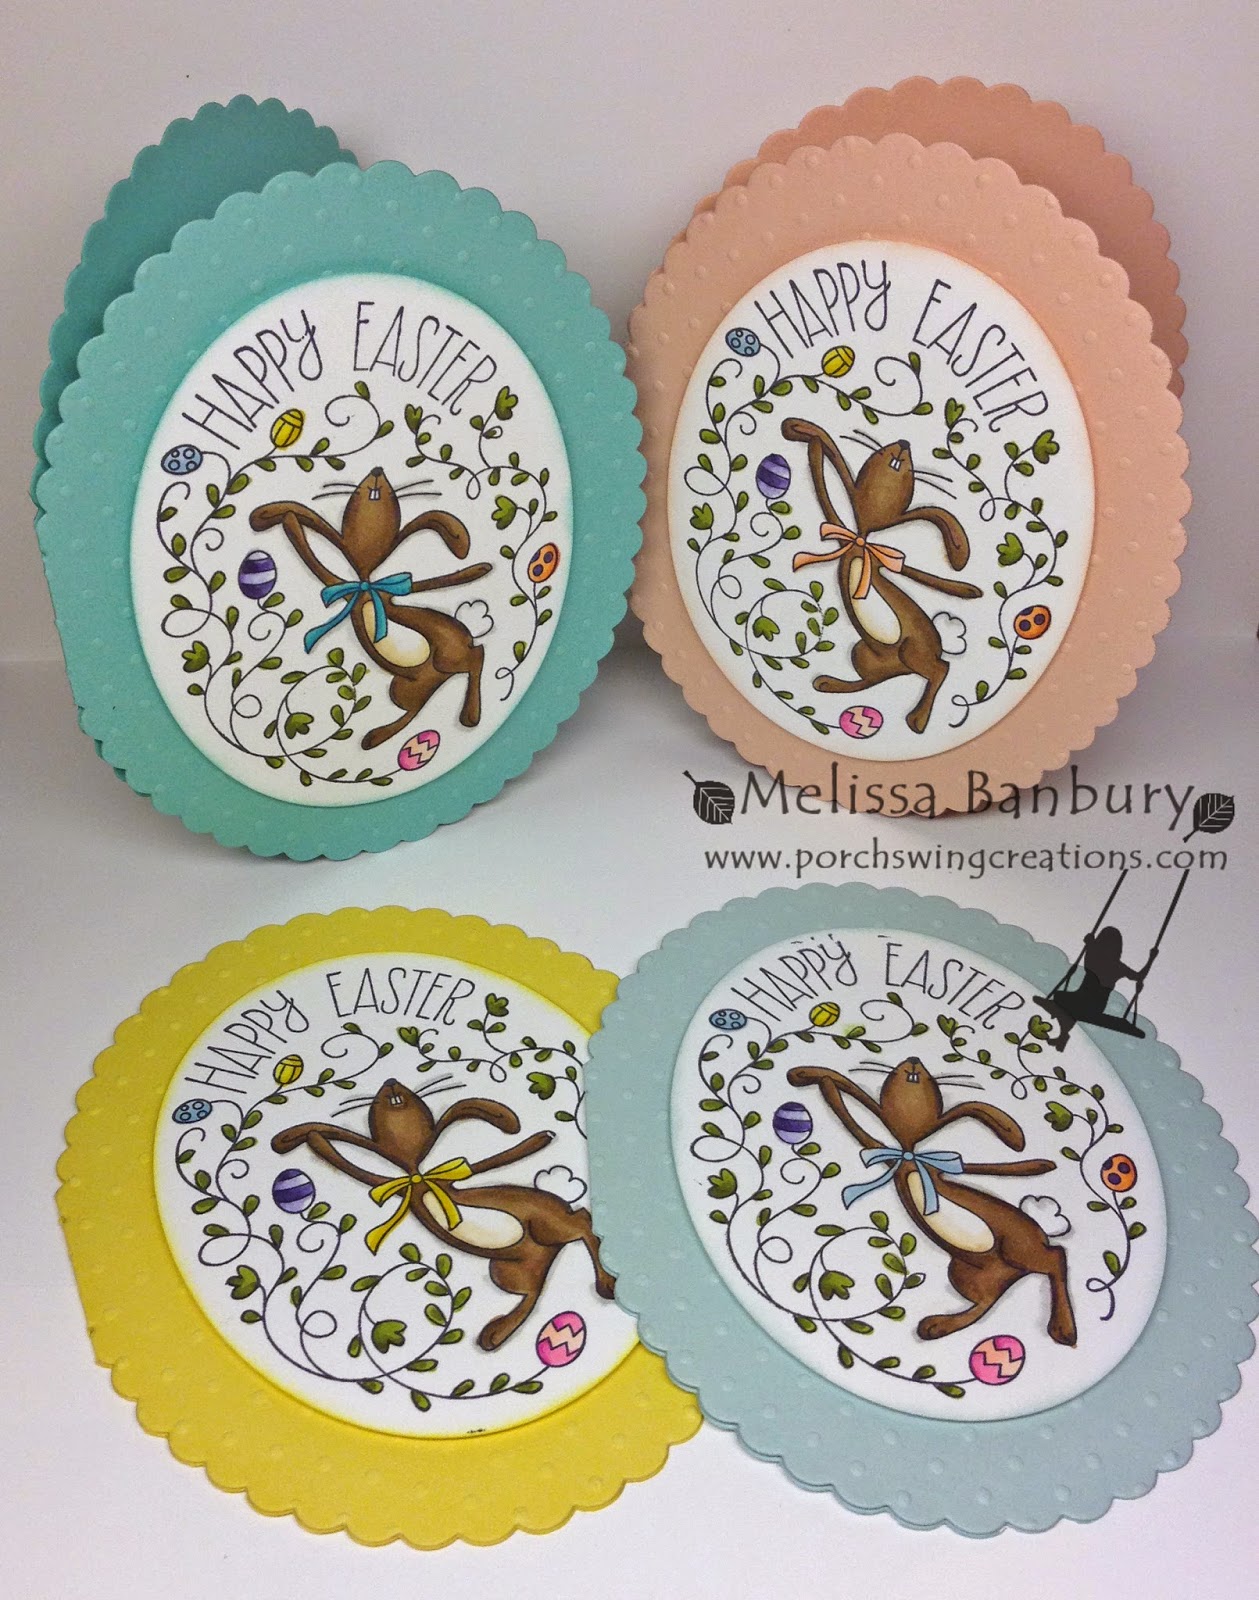
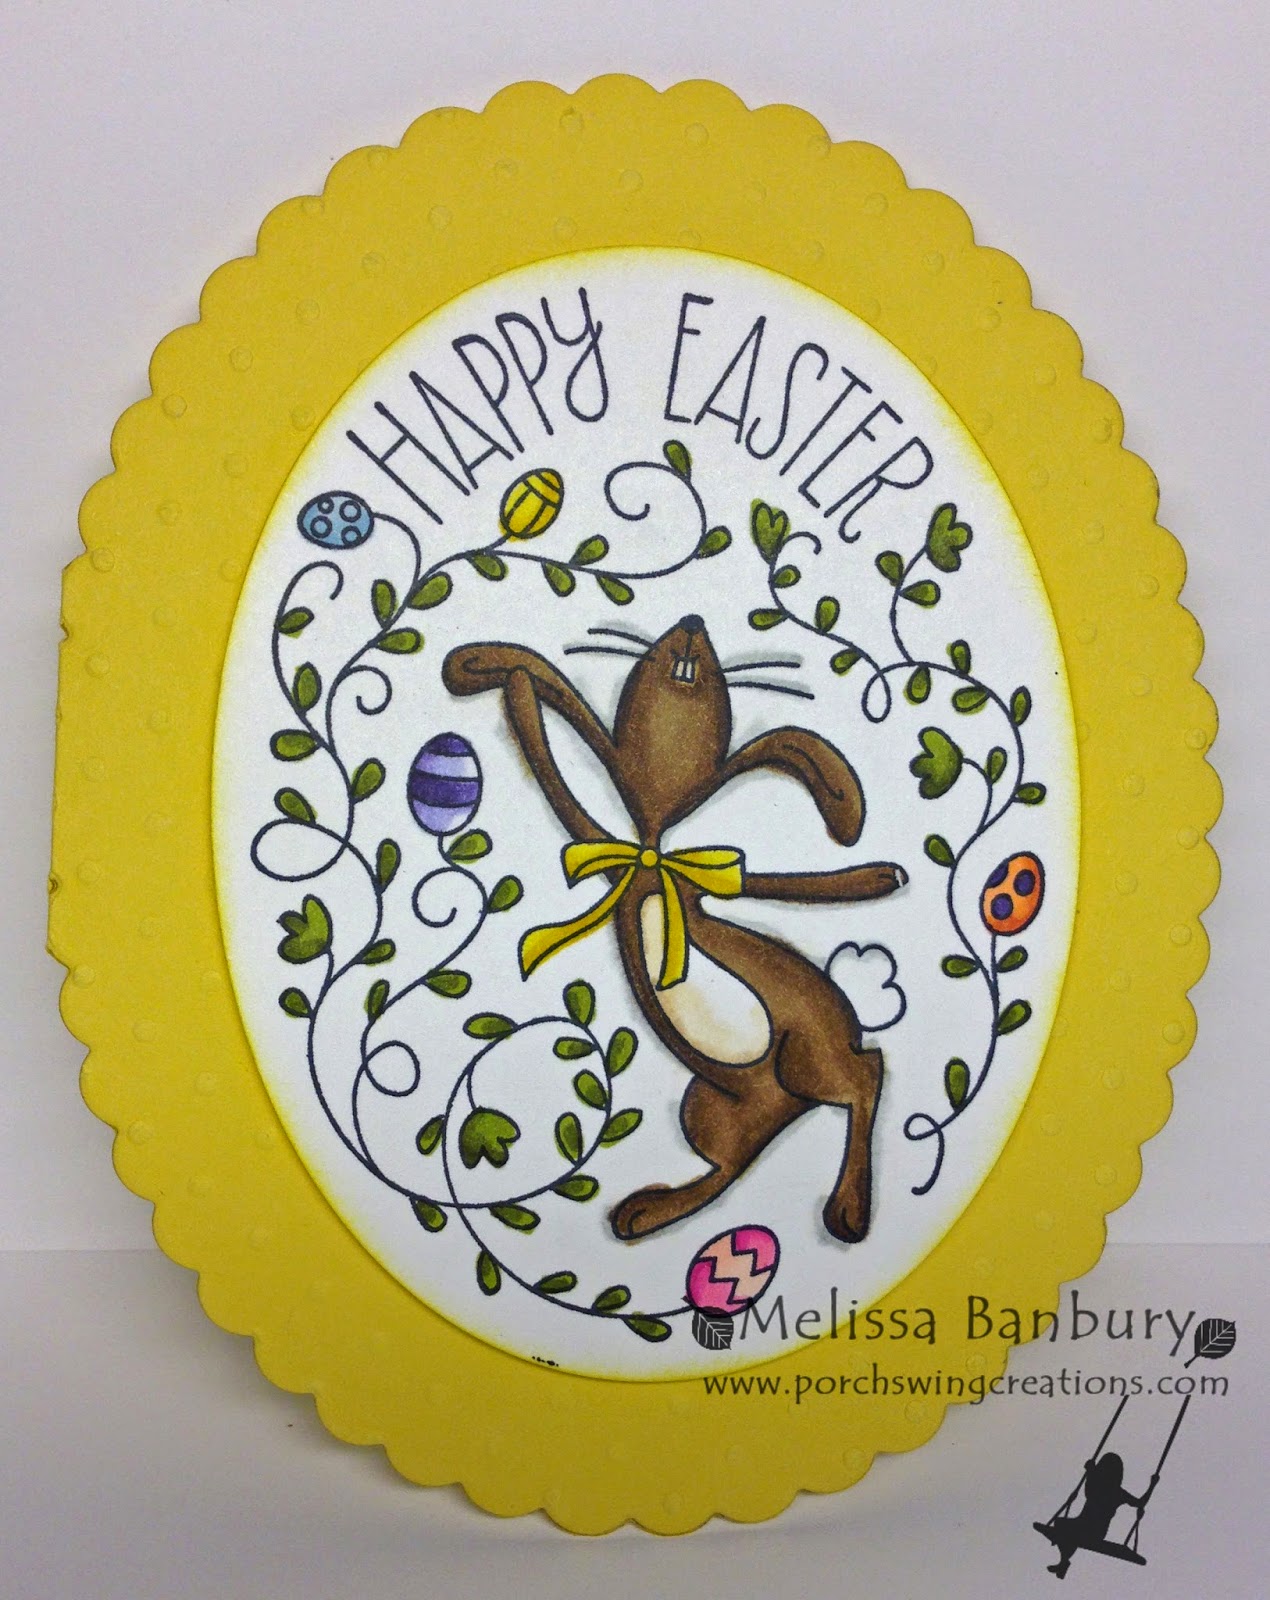
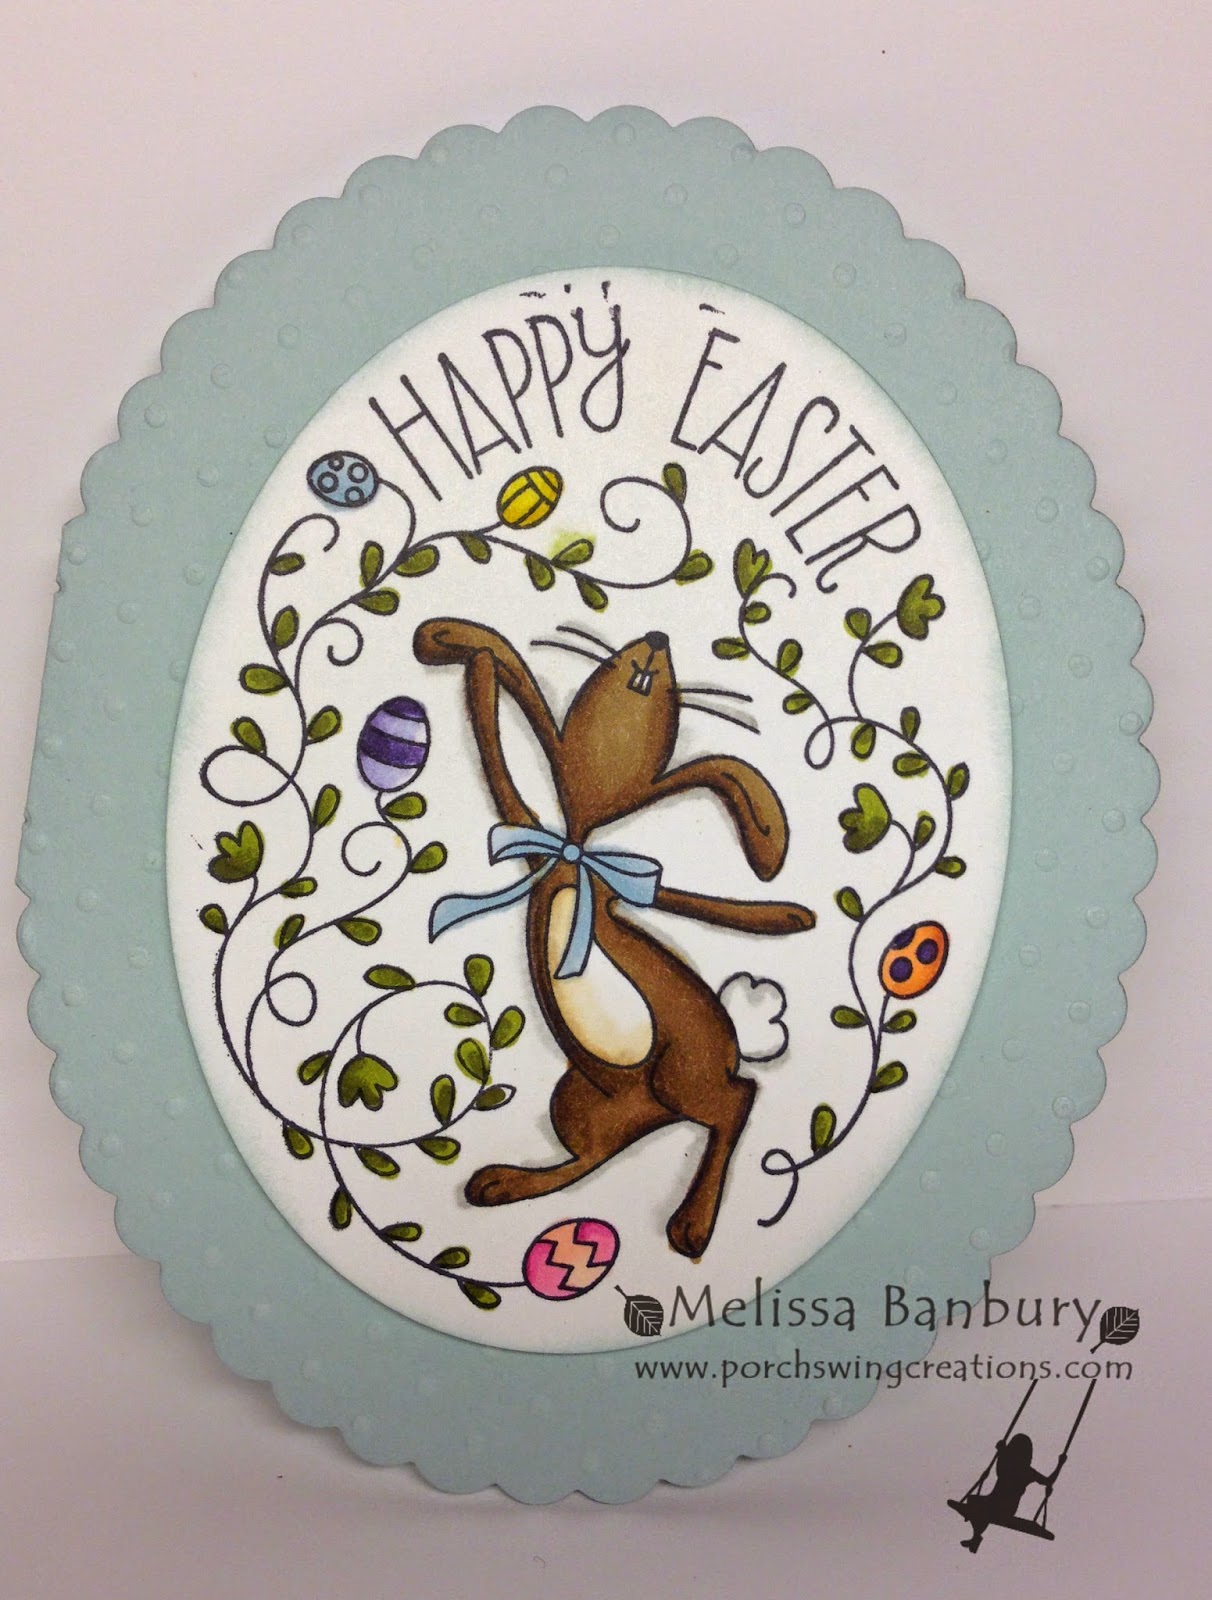
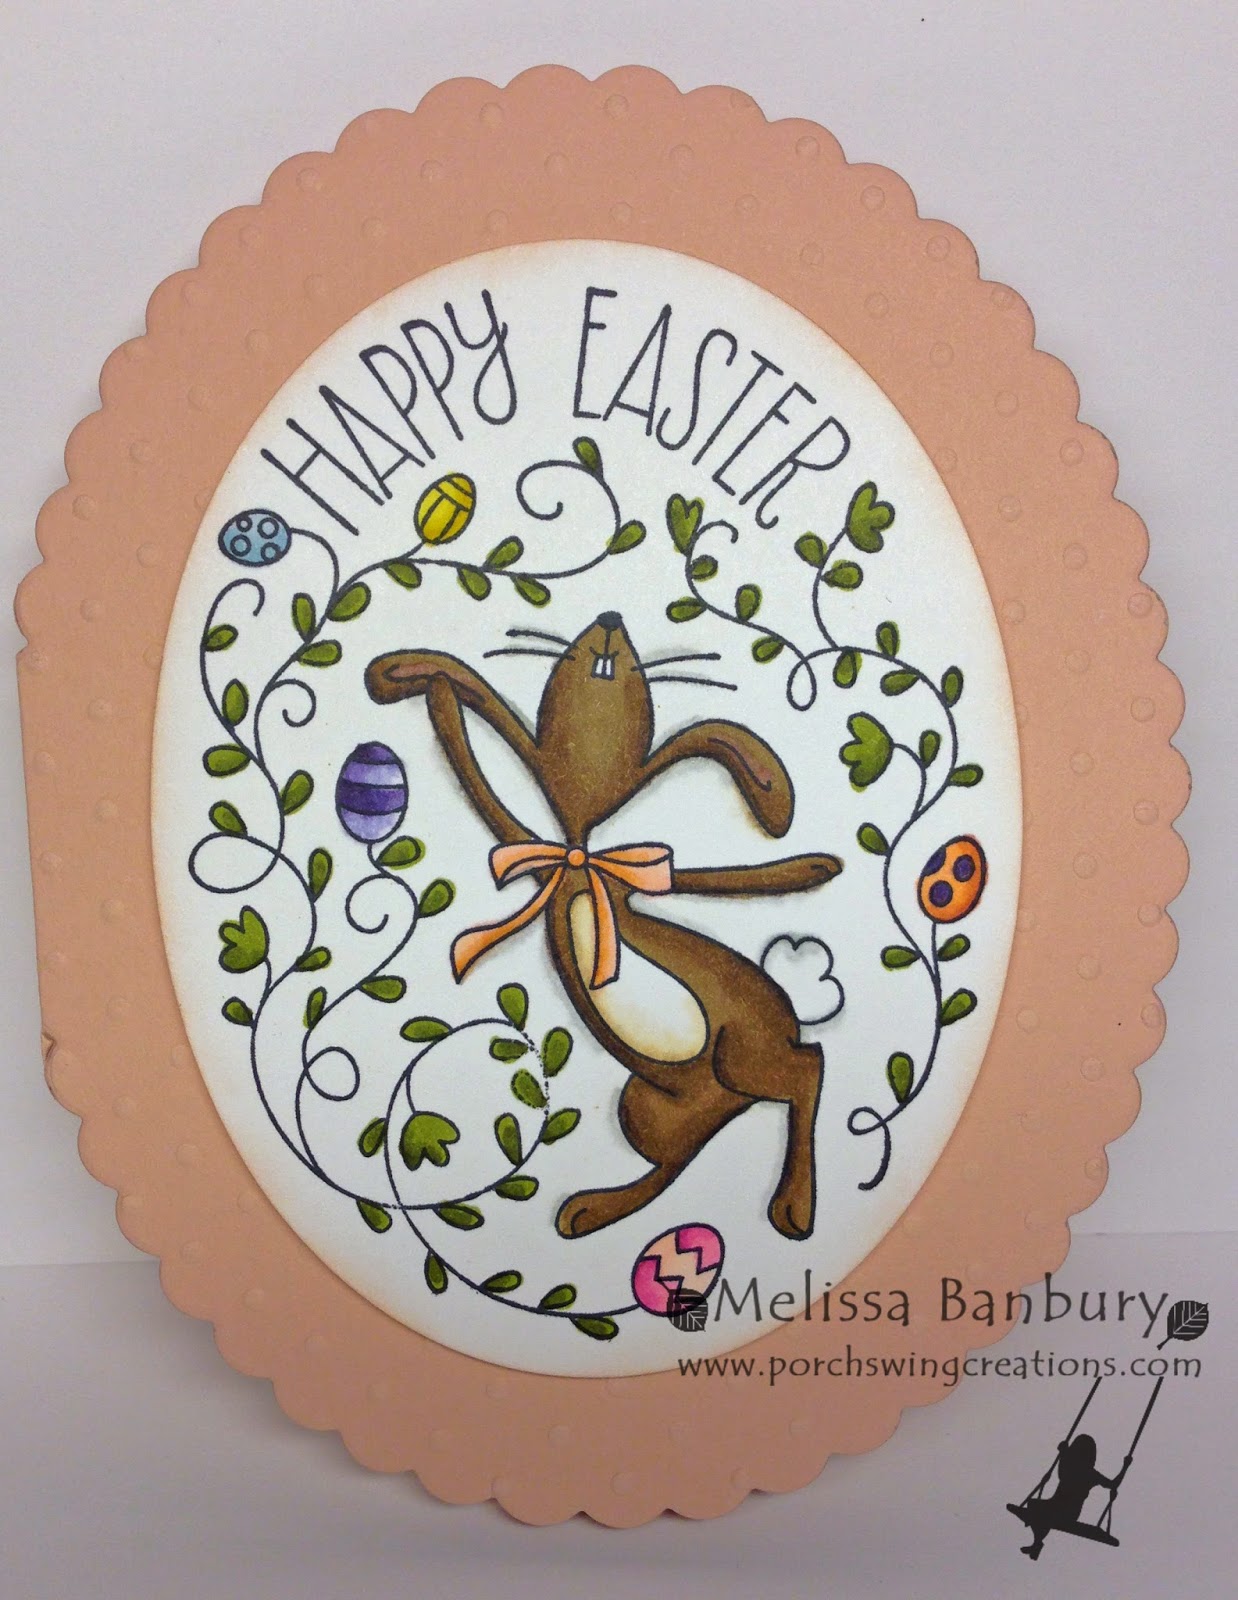
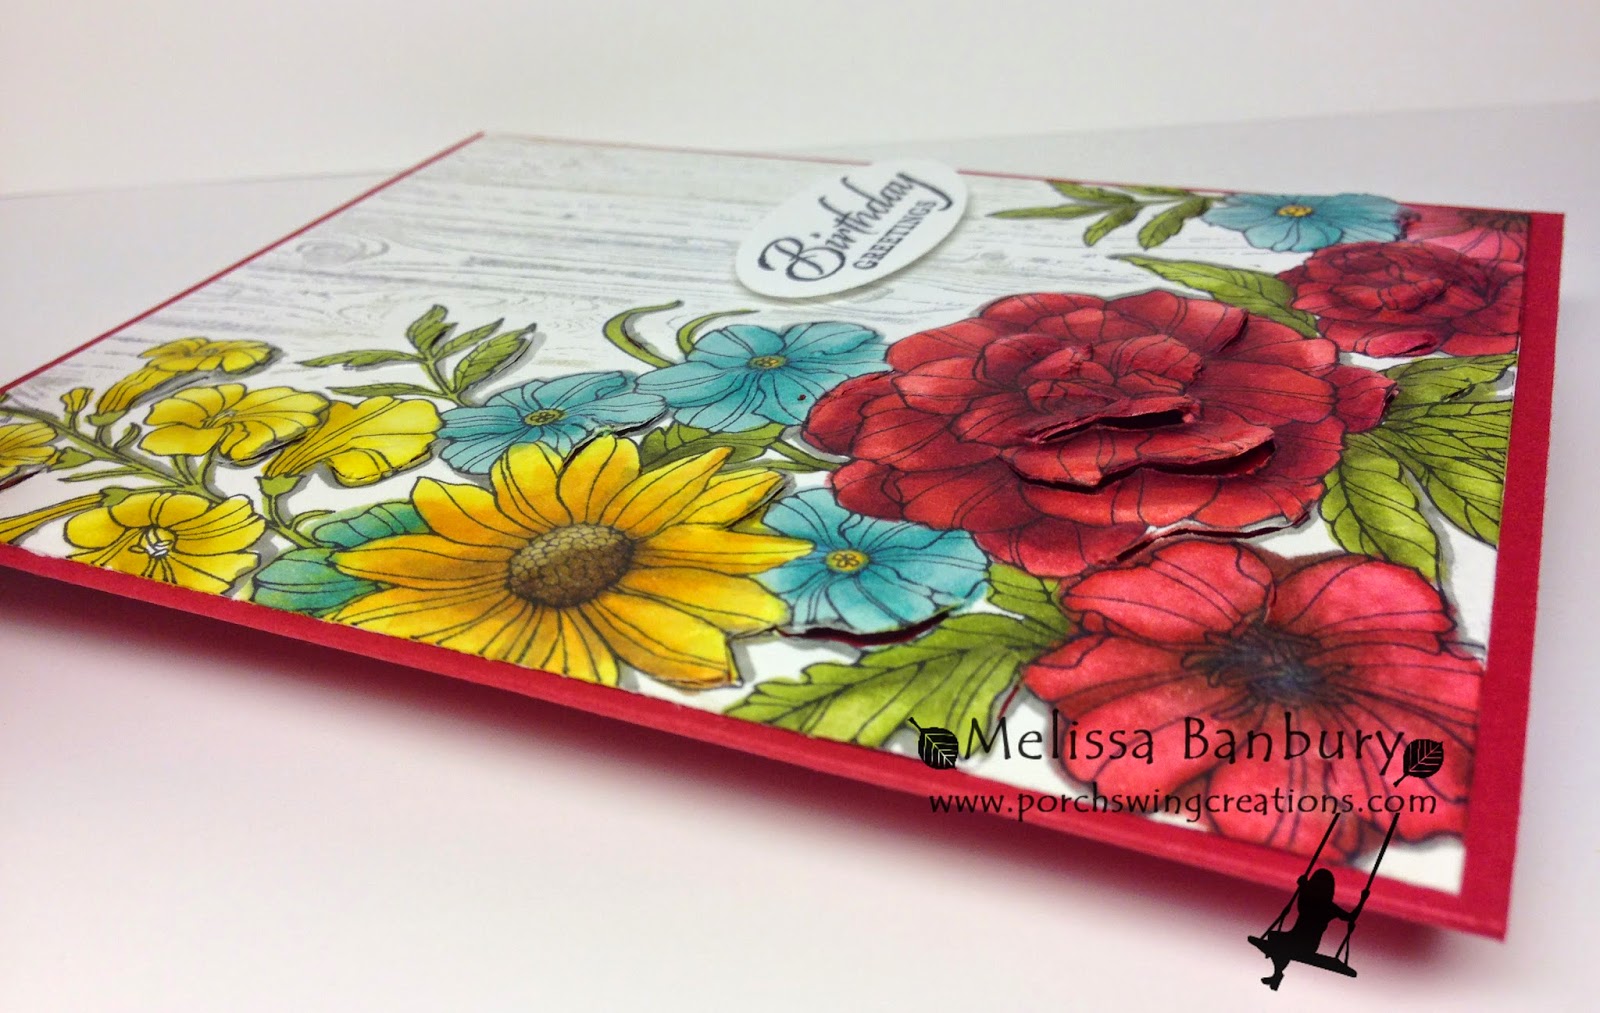
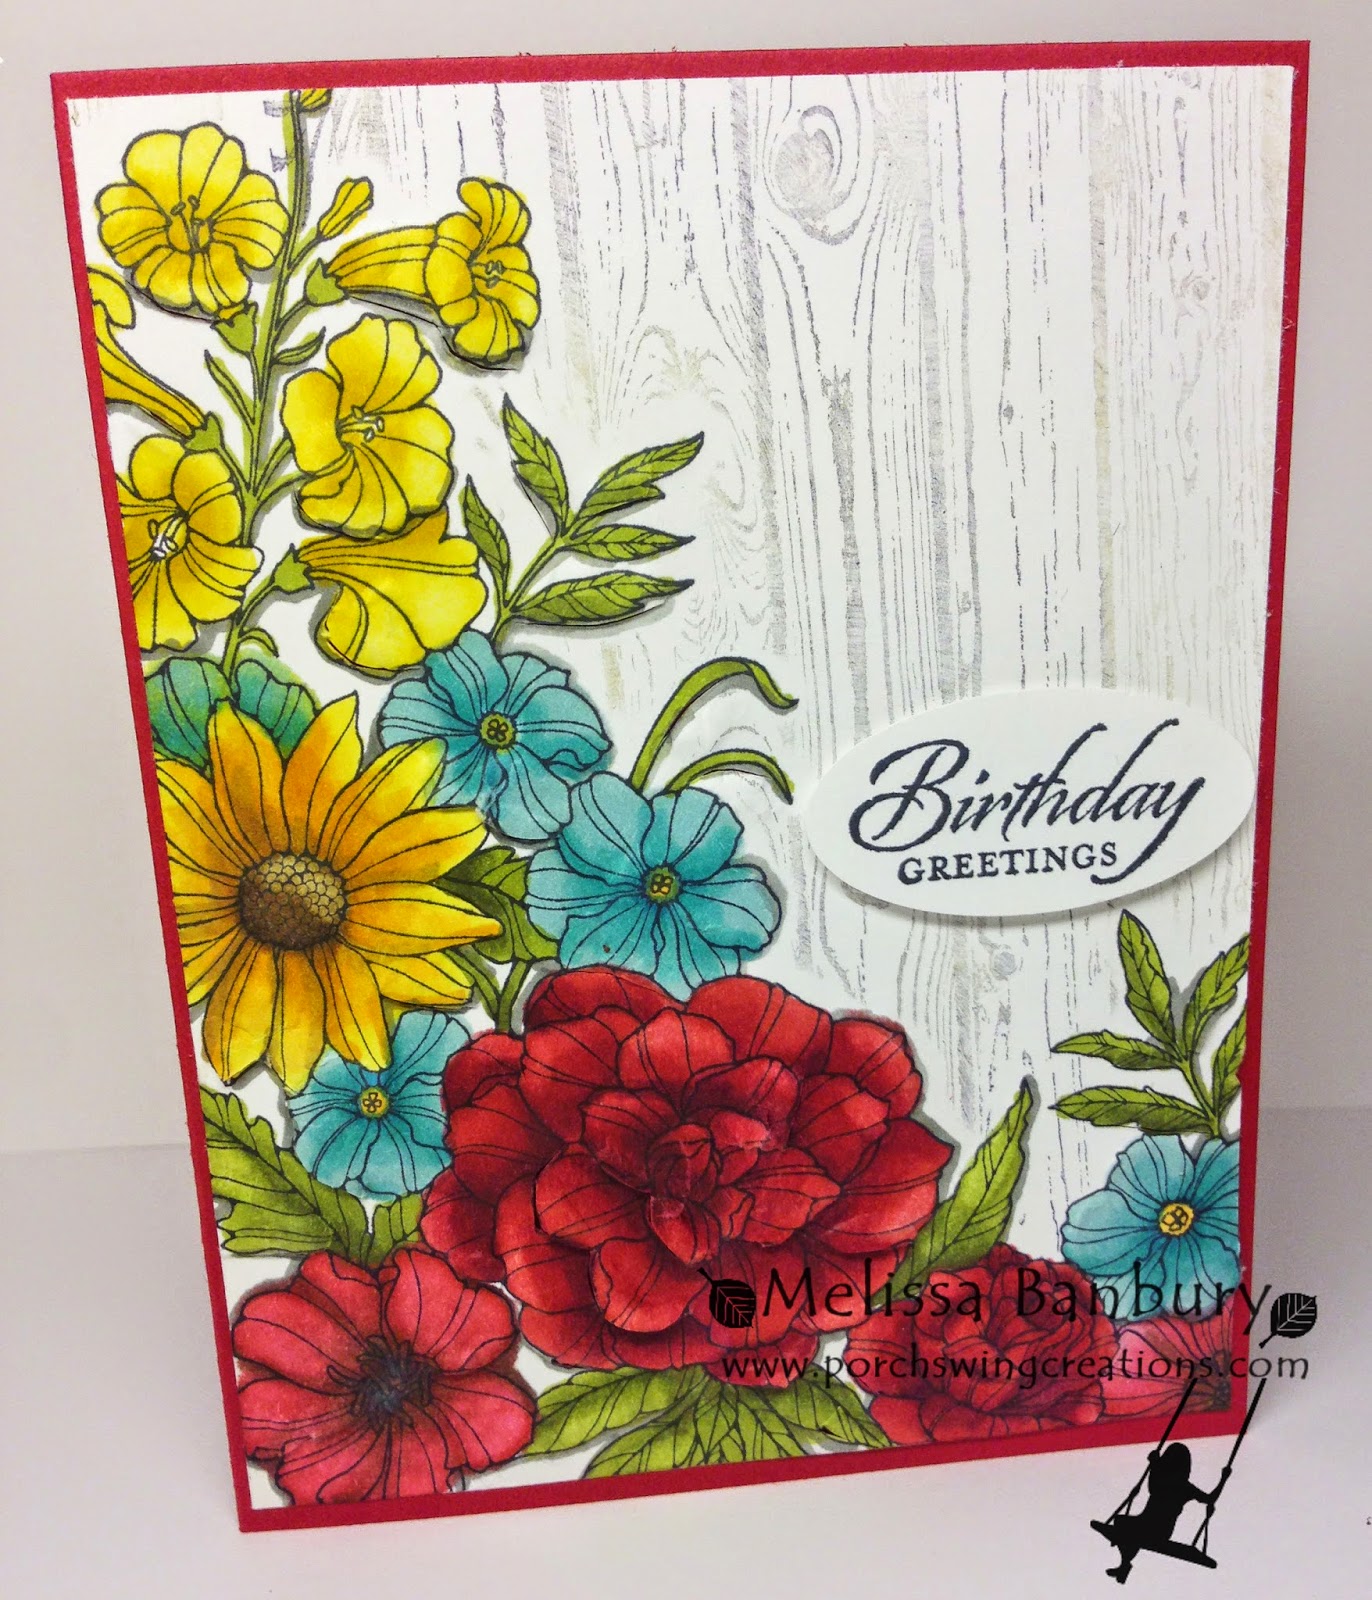
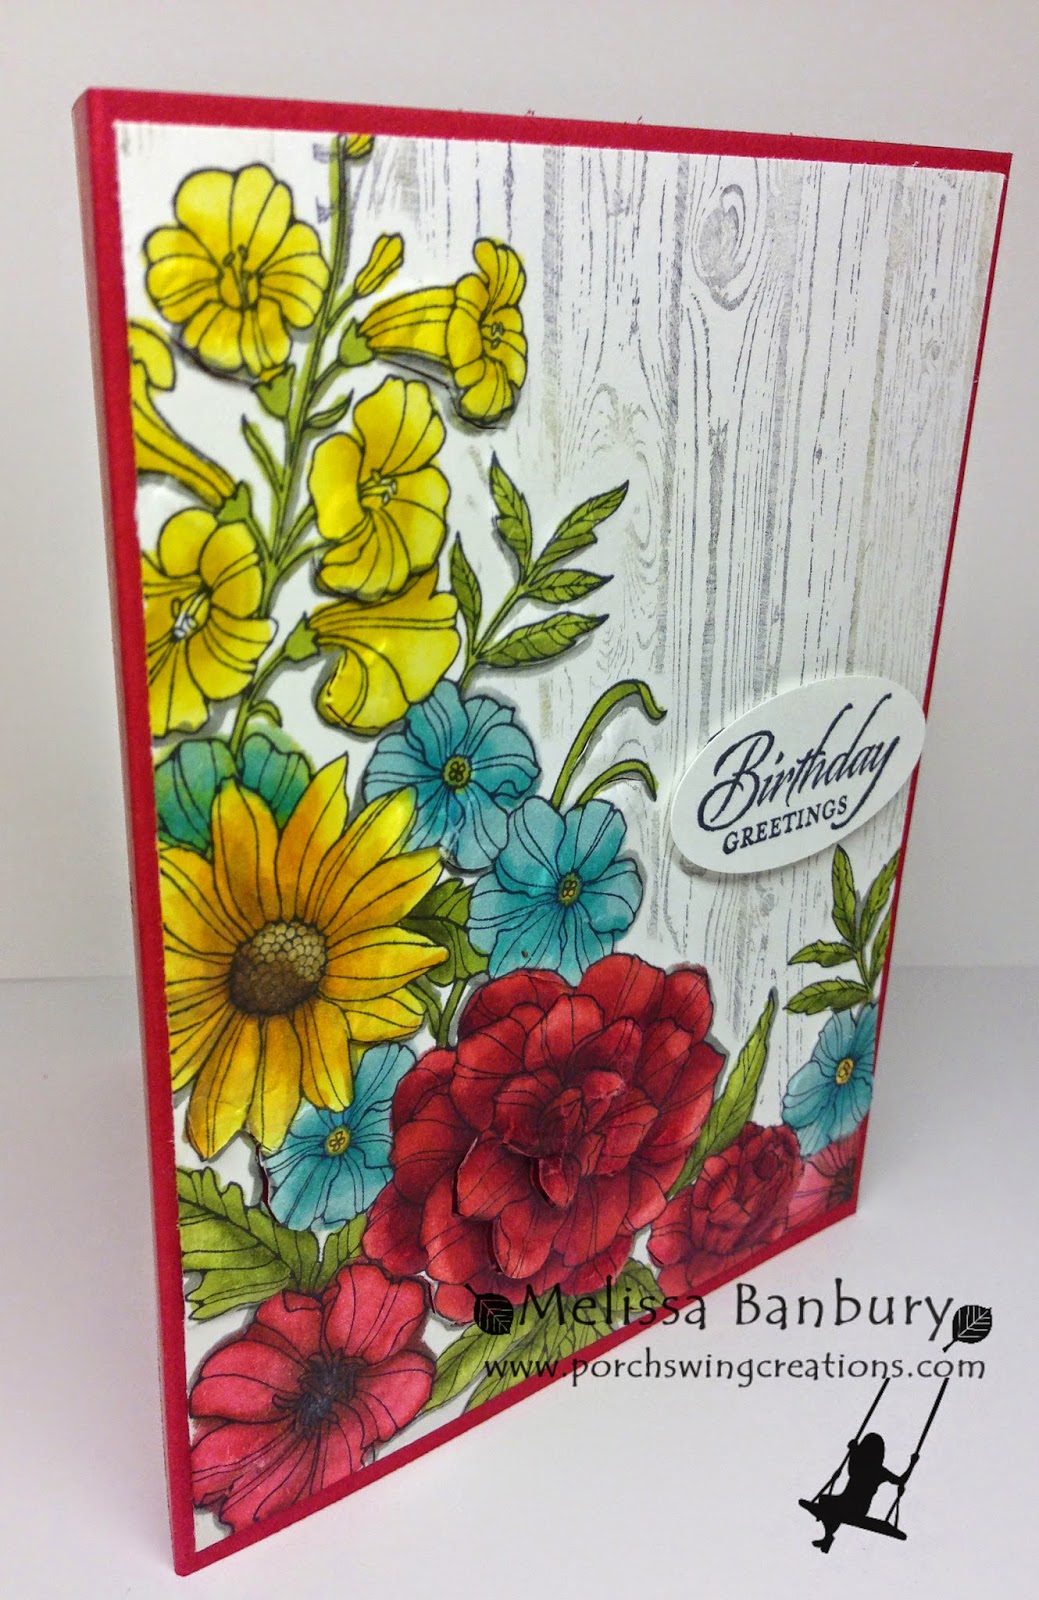
I'm swinging in quick with a card I forgot to share last week!  I seen the tutorial on how to do this One Layer Paper Tole over at Splitcoaststampers a few weeks back and was absolutely itching to try it!  I don't think mine turned out nearly as beautiful as Dina's example but I think with a little practice I might get it right.  It's definitely a technique that takes a little patience and time but the results are simply fabulous with the amount of dimension you can create!  I highly suggest you check out the tutorial and give it a try yourself :)


Supplies:

Stamp Sets: Corner Garden, Hardwood, Wetlands
Card Stock: Whisper White, Cherry Cobbler
Ink: Momento Tuxedo Black, Smoky Slate
Accessories: Blendabilities (discontinued), Large Oval punch, Xacto Knife, Stylus Tool, Foam Mat, Stampin' Dimensionals, Multipurpose Liquid Glue

And yes, I know I used the Blendabilities yet AGAIN but look how pretty it turned out!  I just can't help myself...I know many of you are still using the Blendabilities and still love them!  Would you like to see any tutorials using them even though they are discontinued?  If you would, please comment below; I wouldn't mind sharing a few techniques that might benefit those that already have them and still want to use them!

That's it for me today!  I'm running around like a crazy person trying to finish up Easter projects today - I'm so glad you can't see the mess in my stamping room!  I can hardly turn around in there for all the material I NEED out (hehehe).

See you all soon!
 photo d6fad301-7d1b-423d-a2b6-c4c19f15fe5e.jpg
Pin It

Butterfly Terrarium Gift Set - March Bonus Project!


Hello!

Bring the spring time right inside with this beautiful spring butterfly in the delicate, yet sturdy terrarium to keep it safe and protected.  Hang this sweet little terrarium up and enjoy the butterfly's company.  Give this beautiful piece of spring as a gift with the matching card and gift box!  Worried about cutting out all those windows?  If you have an e-cutter have no fear, an SVG file is included with the tutorial package so you can quickly be on your way to putting together this butterfly's home!

This beautiful terrarium created by Amanda is the perfect Spring Decor addition to your home!  If you have a chance head over to Craft Project Central and leave Amanda a comment on her project.

If you would like to subscribe to the March edition of Craft Project Central and get 10 wonderful tutorials for only $10 then click HERE.

***This is March's Bonus Project.  Bonus projects can be obtained by subscribing to two or more months in a row, putting the Craft Project Central badge on your blog, or by referring a friend and when they subscribe, letting us know.***


MORE MARCH PROJECTS YOU MAY HAVE MISSED:
 photo d6fad301-7d1b-423d-a2b6-c4c19f15fe5e.jpg
Pin It

Saturday, March 28, 2015

Tutorial Store Updates & Corrections!


Happy Saturday!

I've had a number of emails over the last couple days concerning problems purchasing items within my online store; particularly the hovering "P" (Pinterest button) on the "Add to Cart" image that is preventing many of you from purchasing tutorials.

Now, I should warn you that I`m definitely a far cry from a computer programmer (I know just enough to make me dangerous in the world of computer lingo) but I think I have the problem solved. Oh, technology...how I love you and loathe you at the same time - I just wanna make pretty stuff and share it!! LOL

Please feel free to email me if you have any further questions or concerns.  I thank those that have emailed me to make me aware of the problem - it's SO APPRECIATED!

See you Monday!
 photo d6fad301-7d1b-423d-a2b6-c4c19f15fe5e.jpg
Pin It

Bohek Gift Ensemble!


Good Day!

Let's get out of those winter blues and make a couple bright and cheerful projects that you can keep or send to someone that needs a little brightness to cheer them up.  All you need is a Big Shot, a few circle punches, the Basic Butterfly Stamp Set, Butterflies Framelits, and some bright card stock!  Gift ensemble includes a shaker card, matching pen, and a keepsake box!

These happy butterflies created by April will definitely wash away those winter blues!  If you have a chance, head over to Craft Project Central and leave April a comment on her project.

If you would like to subscribe to the March edition of Craft Project Central and get 10 wonderful tutorials for only $10 then click HERE.

MORE MARCH PROJECTS YOU MAY HAVE MISSED:
 photo d6fad301-7d1b-423d-a2b6-c4c19f15fe5e.jpg
Pin It

Thursday, March 26, 2015

"Leggy" the Lamb Treat Holder


Hiya!

My Easter projects are well under way; I have so many ideas and as always so little time to get them done!  I made a few of these cute little "Leggy" the Lamb's for my boys teachers this year and I just couldn't wait to share him with you!  The best part is this little guy stands on his own AND he doubles as a card so you can leave a greeting for that someone special receiving him!

I've taken a little extra time and created a tutorial so you can create "Leggy" for yourself!  Just click on the TUTORIAL STORE tab at the top of my blog, scroll all the way to the bottom of the page and click Add to Cart.  Once your purchase is complete, you'll receive an email from Fast Wagon where you can instantly download the instructions.  

Supplies:

Stamp sets: N/A
Cardstock: Whisper White, Shimmery White, Basic Black, Blushing Bride, Smoky Slate
Ink: Smoky Slate, Blushing Bride
Accessories: 1” x 8” Cellophane Bags, Blushing Bride 1-1/4” Striped Grosgrain Ribbon,
Markers: Basic Black
Big Shot: Circle Framelits, Perfect Polka Dots Embossing Folder
Punches: Boho Blossoms, 1-3/4” Scallop Circle, Large Oval, Extra Large Oval, Heart from Itty Bitty Accents Punch Pack, Cupcake Builder
Misc. : White Gel Pen, Multipurpose Liquid Glue, Glue Dots, Stampin’ Dimensionals, Sticky Strip, Paper Snips, Sponge Daubers, Chocolate Candy Eggs

I hope you'll enjoy making Leggy as much as I did - I think my boys are going to have a hard time parting with them - of course that could just be because they're full of chocolate eggs!!

Have a great day!  I'm working on editing a couple of new video tutorials for you - stay tuned for the how to on how to create this Framed Corner Garden card, as well as this Faux Denim background.  

Until next time...
 photo d6fad301-7d1b-423d-a2b6-c4c19f15fe5e.jpg
Pin It

Wednesday, March 25, 2015

Walk in the Wild Faux Denim


Welcome to mid week!

Before I get to today's card I need to announce the winner of the FREE March subscription to Craft Project Central!  Drum roll please....congratulations Sheryl Knight!!  Her comment was randomly selected from the comments on my Campout Gift Box project - I'll be in contact with you by email shortly Sheryl so you can get crafting ASAP! 

Now onto today's card; a Faux Denim background perfect for those masculine cards.  The technique couldn't be easier or quicker!  Begin with a piece of Marina Mist card stock.  Using the Direct to Paper method first apply Pacific Point ink working top to bottom across the card stock, then working horizontally across the card stock.  Next, apply Night of Navy ink using the same method as with the Pacific Point ink.  To finish the look and add a realistic flair, scrunch up a sandwich bag and using it similar to a sponge, apply Night of Navy ink randomly over the piece.  I gave the piece a further denim look by distressing the edges of the card stock with a Distress Tool.

Supplies:

Stamp Sets: Walk in the Wild
Card Stock: Whisper White, Real Red, Marina Mist
Ink: Pacific Point, Night of Navy
Accessories: Distress Tool, Linen Thread, Stampin' Dimensionals, heavy plastic wrap

I hope this has given you a new idea for those masculine cards!  I think I'll be storing this one away for Father's Day. 

Have a great day...until next time!!
 photo d6fad301-7d1b-423d-a2b6-c4c19f15fe5e.jpg
Pin It

Rustic Office Decor Ensemble!


Good Morning!

This Rustic Office Ensemble is the perfect gift for a college graduate, someone starting a new job or a new phase of life!  This gift offers functionality, decor, and words of advice that can encourage and uplift the man in your life everyday!  The framed sentiment can either stand on the desk or hang on the wall to remind the recipient of important elements of success.  The magnetic board holds a handy, custom notebook and can also be a place for photos or reminders.  The pencil holder and business card holder are coordinated perfectly and keep necessary items within reach and clutter off the desk. The matching card tops of this ensemble and gives you a place to congratulate your man on his accomplishments!

This inspiring ensemble by Julie will add the perfect hint of rustic decor!  If you have a chance, head over to Craft Project Central and leave Julie a comment on her project.

If you would like to subscribe to the March edition of Craft Project Central and get 10 wonderful tutorials for $10 then click HERE.

MORE MARCH PROJECTS YOU MAY HAVE MISSED:
 photo d6fad301-7d1b-423d-a2b6-c4c19f15fe5e.jpg
Pin It

Monday, March 23, 2015

Lotus Blossom Spotlight Die Cutting

Hello!

Well, its the beginning of another week and with only ONE WEEK left in Sale-a-bration I thought I would highlight a couple of the stamp sets.  I love this Lotus Blossom stamp, free with $60 purchase! Each blossom is built up of three photopolymer stamps, and to make it really easy for lining up (no Stamp-a-ma-jg required!!) there is arrows on each stamp to help you quickly and easily ink away!

The card I'm sharing today uses only ONE ink color to create the flowers (which I'll talk more about in a bit) and features a simple technique that helps add dimension to any card front called Spotlight Die Cutting.

Supplies:

Stamp Sets: Lotus Blossom, Gorgeous Grunge
Card Stock: Whisper White, Smoky Slate, Strawberry Slush
Ink: Smoky Slate, Strawberry Slush
Accessories: Chalk Talk Framelits, Perfect Polka Dots EF, Coastal Cabana Thick Baker's Twine, Multipurpose Liquid Glue, Stampin' Dimensionals, Removable Adhesive

To create the Lotus Blossoms using only one color ink, in this case Smoky Slate keep the rule in mind of working darkest to lightest.  With the stamp marked #1 stamp the image with Smoky Slate ink, being mindful of where the directional arrow is pointing.  Apply ink to the stamp marked #2 then stamp off the image ONCE onto a scrap piece of paper.  Stamp the image a second time over top of the first image, lining up the arrow in the same direction as the first image was stamped.  Apply ink to the stamp marked #3 then stamp of the image TWICE onto a scrap piece of paper.  Stamp the image over top of the first two images, lining up the arrow in the same direction as the previous two images.  You should now have a perfectly shaded, three toned flower!  How simple and pretty is that??

To create the Spotlight Die Cut image, first cut a piece of Whisper White card stock to the size you would like to fit on the card front.  Lay a Framelit (the tags from Chalk Talk are a good choice!) into position onto the Whisper White card stock and run through the Big Shot.  Apply a removable adhesive to both negative and positive pieces of card stock and assemble back together onto a piece of scrap paper.  Stamp images so that they fall both on and off the die cut piece.  Remove the pieces from one another.  At this point you can step up your project by re-stamping the images on the die cut portion with Versamark and cover with embossing powder.  This will really "spotlight" your images. Back the larger piece of card stock with a contrasting mat color.  Apply two thicknesses of Stampin' Dimensionals and place back into opening creating your Spotlight Die Cut.

That's all from me today!  If you haven't already make sure you head over to Craft Project Central and leave a comment on my Campout Gift Box & Pop up Card project for your chance to win a FREE subscription to all of March's tutorials!  I'll be making the draw on Wednesday so don't miss out!!

Have a great day everyone!  Until next time...
 photo d6fad301-7d1b-423d-a2b6-c4c19f15fe5e.jpg
Pin It

Sunday, March 22, 2015

Field of Flowers Canvas!


Hello!!

Blue skies, a field of flowers, and butterflies!  The Field of Flowers home decor canvas will brighten up your home and make you long for Spring!  With a few simple supplies you can create a gorgeous piece of art for your wall.  A coordinating card for any occasion is also part of this set...just in case you decide to make an extra canvas and gift it to a lucky friend!  This canvas is sure to brighten any wall!

This pretty canvas by Michelle will have your home Spring ready in just a few simple steps!  If you have a chance head over to Craft Project Central and leave Michelle a comment on her lovely project.

If you would like to subscribe to the March edition of Craft Project Central and get 10 wonderful tutorials for $10 then click HERE.

MORE MARCH PROJECTS YOU MAY HAVE MISSED:
 photo d6fad301-7d1b-423d-a2b6-c4c19f15fe5e.jpg
Pin It

Friday, March 20, 2015

Campout Gift Box & Pop-Up Card!


Hello Everyone!

Just a quick side note before I get to today's project.  I've had a few inquiries as to how I did the cutting on my Framed Corner Garden Card.  Look for a tutorial at the beginning of next week explaining it step by step!

Today is my project's turn over at Craft Project Central!  I had so much fun creating this masculine camping themed ensemble!

Do you have a hard time coming up with project ideas for the men in your life?  This Campout Gift Box & Card may be the perfect solution if they love the outdoors!  This 4" x 4" gift box features all the amking of a perfect outdoor getaway - a tent tucked into the trees, a cozy fire, stars in the sky, and even a "cuddly" guest!  The pop up card completes the set and is sure to bring a smile to his face!

The best part about having my project shared on Craft Project Central is that I get to give away a subscription to March's projects to ONE lucky reader!  If you'd like the opportunity to win 10 fabulous tutorials please head over to Craft Project Central and leave a comment on MY project (and any other project you love while your there).  Please be sure to leave your first and last name along with your email address in your comment so I can contact you if you're the winner.  I'll be choosing a name at random on March 25th so be sure to comment before then!

And if you don't win the free subscription but you would still like to subscribe to the March edition of Craft Project Central and get 10 wonderful tutorials for only $10 the click HERE.


MORE MARCH PROJECTS YOU MAY HAVE MISSED:
Basket Full of Note Cards
Standing Scrapbook for Baby

Thanks for stopping by today!  Until next time...
 photo d6fad301-7d1b-423d-a2b6-c4c19f15fe5e.jpg
Pin It

Monday, March 16, 2015

Creative Blog Hop Framed Corner Garden


Happy Monday!

I was nominated by Shauna to take part in this week's Creative Blog Hop (Thanks so much Shauna - be sure to stop by her blog and say hi from me!!).  As soon as I said yes to Shauna's nomination I knew what I wanted to create - I haven't had near enough play time with my Blendabilities and was so looking forward to using them!

Unfortunately towards the beginning of last week Stampin' Up! announced that the Blendabilities line was being discontinued due to manufacturing issues that couldn't be resolved.  I was saddened by the news but since I already had my card created by that point I thought I would share it anyway; I hope you don't mind!  I'm sure you'll see a few creations pop up on my blog in the future using them because I simply can't part with them just yet.

Supplies:

Stamp Sets: Corner Garden, Apothecary Art
Card Stock: Whisper White, Soft Sky
Ink: Momento Tuxedo Black, Soft Sky
Accessories: Blendabilities (discontinued), Oval Framelits, Piercing Tool, Foam Mat, Xacto Knife, Stampin' Dimensionals

Partaking in the Creative Blog Hop also requires answering four questions so readers can get to know me a little better:

1.  What are you currently working on right now?
At the moment anything and everything Spring related!  I have a couple of little Easter projects planned and a 3D Flower bouquet I'm working on as well; not to mention the stash of miscellaneous cards I always like to have on hand.  It's so nice to not stress when an occasion comes up because of that little stash! 

2.  How does your work differ from others in your genre?
I love working in a 3D format and am constantly pushing myself to look at something that otherwise might be created in 2D and figure out how to make it otherwise!  I try my best to think "outside the box" and create things that might not have been seen before or seen in the same way it always has been seen in the past.

3.  Why do you create like you do?
I like the challenge of having to think differently then others might.  I've always loved to have a creative outlet of some sort and have crafted in some form or another my entire life.  My background is Interior Design so many of the skills I learned while in College have transferred themselves to the work you see in my blog today.  I feel a great sense of calm while I'm paper crafting and an even greater sense of accomplishment when I see a vision come to life!

4.  How does your creativity work?
I spend a lot of time thinking and planning before I begin a project, probably to a fault LOL.  I sit and visualize a project start to finish before I ever touch a piece of paper.  Sometimes that involves sketching but more than often its just quick note taking so I can organize scattered thoughts.  Most of my ideas come to me in that in between awake and sleep stage so I keep a notebook by my bed to jot ideas down before they disappear (weird I know, right?).  As with most creative folks I use social media as well.  I love Pinterest and look for inspiration there if I'm stumped - it's pulled me out of a creative rut more than a time or two!

Now it's my turn to nominate a couple of creative talents!  First, head over to Deborah Smart's blog, Stamp and Create! She's sure to wow you with a creation or two; be sure to say HI! and leave a comment while you're there!!  I'm still awaiting confirmation from my second creative gal and I'll give you an update when I have one :)

With all that being said, I'm off to get a couple of those projects done!  It's an awful place to be when you have tons of ideas rolling around in your brain and not enough time to get them all done LOL!

Until next time...
 photo d6fad301-7d1b-423d-a2b6-c4c19f15fe5e.jpg
Pin It

Saturday, March 14, 2015

Basket Full of Note Cards!


With this tutorial, learn a quick and easy way to assemble the Berry Basket, which you'll find with an assortment of 3" x 3" note cards that feature the Adventure Bound Designer Series Paper Stack.  The note cards, which feature an interesting variety of designs, are perfect for a vast selection of events and occasions.  If a larger card is what you need, there is a project in this tutorial that shows you how to take one of the note cards and convert it to an A2 greeting card that also doubles as a gift card holder.

This quick and easy ensemble is by Regina!  If you have a chance head over to Craft Project Central and leave Regina a comment on her project.

If you would like to subscribe to the March edition of Craft Project Central and get 10 wonderful tutorials for $10, click HERE.

MORE MARCH PROJECTS YOU MAY HAVE MISSED:

Thanks for stopping by!  Until next time...

 photo d6fad301-7d1b-423d-a2b6-c4c19f15fe5e.jpg
Pin It

Tuesday, March 10, 2015

Envelope Punch Board Desk Caddy!


This darling desk caddy is perfect for office supplies, stamping supplies or anything else you want to organize on your desk.  It's made using the Envelope Punch Board and so easy to assemble!  This Desk Caddy makes the perfect gift for anyone and can be altered for men, women, or children - simply change out the Designer Series Paper and embellishments to customize, add a coordinating greeting card and you are set!  Or make one for your own desk or make several to sell at Craft Shows!

This useful little Caddy by Laurie is sure to have your supplies organized in no time!  If you have a chance head over to Craft Project Central and leave Laurie a comment on her project.

If you would like to subscribe to the March edition of Craft Project Central and get 10 wonderful tutorials for only $10, then click HERE.

MORE MARCH PROJECTS YOU MAY HAVE MISSED:

Until next time...
 photo d6fad301-7d1b-423d-a2b6-c4c19f15fe5e.jpg
Pin It

Saturday, March 7, 2015

Butterfly Mini Note Card Set!


Make this beautiful mini note card set for a sweet friend, with a matching box to hold them and a sweet butterfly pin.  Learn how to make your card look like it was bought in a store with heat embossing and glitter paper.  Try your hand in a technique, called "Bokeh" affect, and turn your butterflies into multicolored embellishments.  Learn how to add simple, but interesting touches to your cards hat will wow and recipients.  Great for a stamp camp, or as a class project.

This sweet project is by Monika and is sure to make your heart flutter!  If you have a chance head over to Craft Project Central and leave Monika a comment on her project.

If you would like to subscribe to the March edition of Craft Project Central and get 10 tutorials for only $10, then click HERE.

MORE MARCH PROJECTS YOU MAY HAVE MISSED:

Thanks for stopping by!  Until next time...
 photo d6fad301-7d1b-423d-a2b6-c4c19f15fe5e.jpg
Pin It

Friday, March 6, 2015

Elsa's Ice Castle Card in a Box & Gift Tag


Happy Friday!

I know I said in yesterday's post I was done with Winter projects but I had this one on the go for the last week and just put the finishing touches on it a couple nights ago!  I hope you don't mind - it's for a good cause I promise - my Niece is turning the big 3 next week and she is Frozen OBSESSED (as I am sure every little girl is!).

I wanted to make a card that was a little unique to some of the others I've seen out there and as usual the idea came when they always do...when I'm trying to sleep LOL.  I envisioned Elsa's beautiful ice castle and I think the finished product turned out pretty darn close.  My validation on kid related projects almost always comes from one of my boys so when I asked Griffin what he thought it was and he immediately said, "Elsa's Castle!" I knew I had a winner :)  I wish you could see it in person - it sparkles and shimmers just like real ice!  Given as a gift it would be a nice touch to add in a battery operated tea light; the castle REALLY comes to life then!

And the best part of the ice castle? If you guessed that its a Card in a Box, you'd be right!  I made the tag as an addition so I could write her Birthday message on the back of it instead of cluttering the walls of the castle.

As I'm fairly certain that there might be a few other little girls out there that might enjoy Elsa's Castle as much as I'm hoping my Niece does, I thought I would make a Template and Tutorial available. Just click on the Online Store tab at the top of my blog and you'll be able to purchase an automatic download so you can get started right away! 

Supplies:

Stamp sets: And Many More
Card Stock: Silver Glimmer Paper, Coastal Cabana, Bermuda Bay, So Saffron, Whisper White, Blushing Bride
Ink: Blushing Bride, Coastal Cabana, Crushed Curry
Accessories: Window Sheets, Rhinestone Basic Jewels, Coastal Cabana Thick Baker’s Twine
Markers: Basic Black Stampin’ Write Marker, Medium Coastal Cabana Blendabilities
Big Shot: Oval Framelits, Perfect Polka Dots Embossing Folder
Punches: Boho Blossoms, Bird Builder, Cupcake Builder, Owl Builder, Small Oval, Large Oval, Word Window, Petite Pennants Banner, Heart (Itty Bitty Accents Punch Pack), ½” Circle
Misc. : Simply Scored Scoring Tool, Iridescent Ice Embossing Powder, Piercing Tool, Heat Gun, Versamark, Glue Dots, Multipurpose Liquid Glue, Sticky Strip, White Gel Pen, Paper Snips, Xacto Knife

Have a great weekend!  I'll see you all back here next week!

 photo d6fad301-7d1b-423d-a2b6-c4c19f15fe5e.jpg
Pin It

Thursday, March 5, 2015

Happy Easterbunny Note Card Set


Hello!

Well, the weather has taken a few dramatic turns over the last couple days; yesterday was -40 with the wind chill and today were at -8!  It must be a sure sign that Spring is on its way when the weather can't make up its mind, right?  That's my theory anyway, and I'm running with it and going to start creating Spring related projects NOW!

Let's start off the Spring projects with this cute note card set featuring the Happy Easterbunny stamp! My son`s Kindergarten class is having an Easter Basket raffle and parents were asked to donate Easter related items.  I let him pick out a few things from the store but I thought it might be nice to add a little something homemade.  They were quick to make and it gave me a chance to play with my Blendabilities a little more which is an opportunity I'll never pass up!

Supplies:

Stamp Sets: Happy Easterbunny
Card Stock: Whisper White, Blushing Bride, So Saffron, Soft Sky, Coastal Cabana
Ink: Momento Tuxedo Black
Acessories: Oval Framelits, Perfect Polka Dot embossing folder, Assorted Blendabilities, Stampin' Dimensionals

Here's a closer look at each of the cards:


I hope this has inspired you to get in Spring Creating Mode!  Until next time...

 photo d6fad301-7d1b-423d-a2b6-c4c19f15fe5e.jpg
Pin It

Wednesday, March 4, 2015

Family Established Shadow Box & Card!


Need an anniversary gift for that special couple?  This shadow box is the perfect gift for them.  It features their family name, along with the year they were married.  Make one for them, and one for yourself.  Make the coordinating card to make the gift complete!  The shadow box and card feature the Butterfly Basics Stamp Set and the Butterflies Thinlet Dies.  Directions on how to color the flowers and Gold Foil Sheets with Blendabilities is included in this tutorial.  This would also make a great class,

This thoughtful project was made by Christy and is sure to pull at the recipients sentimental heart strings.  If you have a chance, please head over to Craft Project Central  and leave Christy a comment on her project.

If you would like to subscribe to the March edition of Craft Project Central and get 10 wonderful tutorials for only $10, click HERE.

MORE MARCH PROJECTS YOU MAY HAVE MISSED:

Until next time...
 photo d6fad301-7d1b-423d-a2b6-c4c19f15fe5e.jpg
Pin It

Sunday, March 1, 2015

Paper Succulent Garden Gift Set!


Hello! 

I was honored to be asked again to be part of Craft Project Central March edition!  Over the next month you'll have the opportunity to see some great projects, I hope you'll take a few extra minutes to visit these wonderful ladies blogs and give them some LOVE!  My project is coming up a little later in the month and with it I'll be giving away a FREE subscription to this month's tutorials so be sure to check back for that!  Now, onto this month's first project!

Create the ultimate no-maintenance garden with these faux succulent plants!  You'll learn how to make five different succulents in a variety of colors and textures that will make the everlasting garden.  The coordinating 'succulent' card makes for the perfect presentation to give this as a gift or to someone special.  The Gift Box is a quick, but cute way to add a little special wrapped treat or a small gift to include for your recipient.  Plus, you'll get a great tip on how to wrap this Takeout Box without a lot of fuss using your Designer Papers!

This delightful little garden was created by Julie!  If you have a chance, head over to Craft Project Central and leave Julie a comment on her project.

If you would like to subscribe to the March edition of Craft Project Central and get 10 wonderful tutorials for only $10 then click HERE.

Until next time...

 photo d6fad301-7d1b-423d-a2b6-c4c19f15fe5e.jpg
Pin It
Related Posts Plugin for WordPress, Blogger...