Tuesday, November 29, 2016

Merry Mice Pop & Twist Card AND Blog Candy Winner!


Hello!

We woke up to a SNOW bunch this morning!  As much as I'm not a "winter" person I have to admit that it sure looks pretty outside ( I may regret saying that when I head out to shovel after I write this post!)

Anyhow, a little of the white stuff definitely helps put one in the Christmas Spirit and put's Christmas card making in high gear!  Before I go into detail on this Merry Mice Pop & Twist card pictured above I thought I should announce the winners of the Merry Mice Tag Blog Candy.  Thank you for all the wonderful comments that you left - I love that Christmas spirit can be found even in the littlest of things!


The Winner on the Facebook post - Angie Williams

The Winner on the Blog post - Heather A.

Heather A said...
My favourite thing about the holiday is visiting family. And holiday foods! Love your artwork.
Heather, be sure to forward me your email address via email and I'll get them out in the mail to you right away!

Thanks again for everyone who took the time to enter!  I'll be hosting another giveaway very soon, so be sure to subscribe so you don't miss out!

Okay, back to today's cute and interactive card!  These Pop & Twist cards are taking the world of Pinterest by storm and I succumbed to peer pressure and had to make one for myself.  I demonstrated this card at my last Techniques Class and it was a definite hit - I think my sister ended up making half a dozen of these by the day's end LOL.

If you're unfamiliar with this card fold simply search Google or You Tube for Pop & Twist Card Folds; you'll find tons of tutorials and all the dimensions that will get you started.  And once you have that inside mechanism figured out it's easy peasy to make!  It's like pure magic the way this card looks like any old other when closed but when you open it up a series of smaller cards unfold from within.  Whomever came up with this idea is a genius!


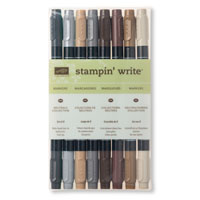
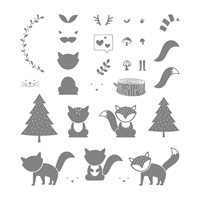
As you can probably tell by my a couple of my previous posts I'm really really enjoying using this Merry Mice set.  They are easy to layer onto a card such as this one and give me the opportunity to color with my Stampin' Write Markers which is always a win win in my books.


Supplies:
Before I head off I just wanted to remind you to sign up for my Holiday Newsletter!  It is sent out each Friday until the week before Christmas and features tutorials and tips on cards, tags, and other items for the Holiday Season. These tutorials are not posted on my blog so the only way you can get them is to sign up!  If you've signed up but are missing previous weeks and would like to receive them, just send me a quick email and I'd be happy to send you the links!
 photo Signature.png Pin It

Thursday, November 24, 2016

THANK YOU!


Happy American Turkey Day!

Happy Thanksgiving to all my American friends today!  I hope you stuff yourself fully of turkey and pie and enjoy precious time with family and friends!  Being Canadian we celebrated our Thanksgiving a month and a half ago...so keep me in your thoughts while I sit lonely without turkey, stuffing, and pie today in my stamp room LOL.

I've just discovered that there may have be some issues commenting on my blog posts and I think I now (finally) have it all sorted out.  If you've been attempting to comment on my Merry Mice Tag Blog Candy post and were unable to, I'd love for you to try again!  Seeing your comments brightens my day immensely!  I'll extend the draw date to Monday November 28th just to give everyone a chance to comment if you've been trying to and couldn't!

As another small Thank You for being such wonderful subscribers I've jumped on board the Black Friday train and have listed EVERYTHING in my Tutorial Store at 10% off today through Saturday at midnight CST!   At checkout use the code SAVE10 to receive your discount.  So, if you've been eyeing up a sponging tutorial or a 3-D Christmas project, be sure to take advantage of the savings while you can!

Thanks so much for stopping by!

If you're curious about the little gift boxes above they're made with the Gift Box Punch Board, sized at 2-1/2" x 2-1/2" x 1-3/4".  Perfect for holding a small "Thank You" during the Holiday Season!

Supplies:

 photo Signature.png Pin It

Wednesday, November 23, 2016

Autumn Evening Reflection


Good Morning!

I hope today finds you in great spirits!  Although I've been knee-deep in Christmas/Holiday themed cards and projects lately I'm still hanging on to that Autumn feeling.  I've never seen prettier sunsets then at this time of the year.  The colors are so spectacular and are perfect inspiration for sponged scene cards!

I used a long ago retired set, Nature's Silhouettes for this card simply because I can't resist a good deer.  It's a set perfect for masculine type cards - if you have it in your collection, don't let it go!

Quick Steps to re-create this card:

  1. Create a horizon line across the center of the Whisper White card stock (either by eyeball or pencil line if that suits you better).
  2. Sponge Sweet Sugarplum and Elegant Eggplant above the horizon line.
  3. Sponge Dapper Denim around the outer edges, blending into the purples in the center.
  4. Below the horizon line, keeping in line with the purples above, sponge a small amount of So Saffron.
  5. Blend Sweet Sugarplum just below the So Saffron.
  6. Blend Perfect Plum outwards from the center, filling up the remaining white space.
  7. Add shadows by sponging Elegant Eggplant around the outer edges.
  8. Stamp the tree/grass line and the deer using Momento Tuxedo Black ink.
  9. To create the reflections:
    1. Align the tree image stamp using the Stamp a ma jig tool and stamp directly onto the smooth side of the plastic mat that comes with the tool.
    2. Flip the mat over, align with the previous stamped image and press down, transferring the ink to the card stock.
    3. Repeat the first two steps with the deer image.
  10. Add ripples within the water area using a White Gel Pen
It should be noted that because this is an older set, it is Wood Mount.  If you have an image that's a Classic Rubber stamp or a Photopolymer stamp creating the reflection technique is much easier and can be done using the same method I described or by using a MISTI tool.  There are many videos explaining the process on You Tube so be sure to check them out before you get started!

If you still are unsure of the process, please comment below and I'll whip up a quick photo tutorial on my process!

Supplies:
Additional Supplies: Nature's Silhouette (retired stamp set), White Gel Pen


I hope you have a wonderful day!  Be sure to enter my blog candy giveaway by entering on yesterday's post or on my Facebook page!

 photo Signature.png Pin It

Tuesday, November 22, 2016

Merry Mice Tags Blog Candy!


Hello Everyone!

It's been forever since I did a blog candy giveaway and I figured it was high time to do one!  I featured a tutorial for making these "Merry Mice" tags a couple of weeks back in my 12 Weeks of Christmas/Holiday's Newsletter and thought it might be nice to pass them on to someone who could make use of them to pretty up a present or two!

I have a one set of 6 to give away to one lucky subscriber here on my blog and another set of 6 to give away to one lucky subscriber on my Facebook page!  To enter the giveaway here on the blog, simply leave a comment telling me your favorite thing about the Holiday's.  I'll choose a winner on Sunday November 27th!

If you'd like to double your chances of winning, head over to my Facebook page.  Be sure to "Like" my page, "Share" my post, and "Comment" with your favorite thing about the Holiday's.  I'll choose a winner on Sunday November 27th there as well.

Good Luck to All!

Pin It

Wednesday, November 16, 2016

Ice Hockey Punch Art


Hello!

I'm sharing a little punch art today depicting Canada's favorite winter pastime - HOCKEY!  The weather isn't quite what we'd normally get in November on the Prairies but that doesn't stop hockey season!  The local teams have been practicing and playing for close to a month now making hockey a top priority for many families.

My son's friend recently had a hockey themed birthday party and I was asked by another family invited to the party to make a hockey card for the birthday boy.  I could have easily made a hockey stick and puck but I wanted more LOL.  I decided on making a punch art hockey player and decked him out in the birthday boy's hockey team colors and jersey.  I had way too much fun making him...right down to the Silver Foil Sheet skate blades!  

Supplies:
Many pieces were hand cut without the use of punches.  I highlighted areas and added details with a white gel pen and used the Small Letter Thinlits (retired) to spell the name on the bottom of the card.

I hope you're having a great week so far!  I've been super busy preparing for another Craft Show Pop Up this Friday.  You can see many items I've made for the sale by checking out and "Liking" my Facebook page.  I post many updates and photos there that I don't share here on my blog so be sure to stop by there and say hi!
 photo Signature.png Pin It
Related Posts Plugin for WordPress, Blogger...