I'm starting to feel the craziness of the season! We finished up one family Christmas get together over the weekend and have another this weekend so I'm trying to make the days during the week super productive. Today we've done some baking and crafting and now we're just waiting for my oldest son to get home from school so we can decorate the cookies!
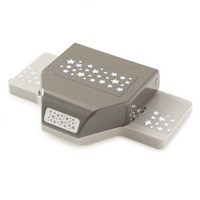
I thought I'd take a one post break away from my Holiday stamping and share my sister's birthday card and gift with you today. We both really love Harry Potter so I used that as my jump off point to come up with this Z-Fold card. I cut the silhouette of Hogwarts freehand from Basic Black card stock and glued it on the front of the Z fold. All details on the castle were added with a White Chalk marker. I used the Confetti Stars Border punch along the top edge of the card, thinking at the time that it might look really neat to have a tea light behind the card so the stars would glow. The owl silhouette is also cut free hand from Basic Black card stock and highlighted with the Chalk marker as well. The deer is the larger of the two deer from the stamp set In The Meadow. I stamped the image onto Smoky Slate card stock, cut it out, then flipped the image over to create the silhouette effect.
Supplies:
The Terracotta pot is actually the bottom water catch pan from another pot but was the perfect depth for a garden like this. The castle is a fish tank accessory as is the rock around the castle. The little deer and bottle brush trees are from Michael's. I made Hedwig and Harry from clay, and the Hogwarts House Banners are free printable's I found online and printed to fit the space. I love how little they are but still show all the detail.
 Pin It


6 comments:
I absolutely love this card and have a friend I would love to make one for. I am not an artist, so there is no way I could draw it freehand. Do you have a pattern that you would share. Thanks.
Linda D.
Wao! Your art work is awesome. They way to create all these things is awesome I will try this too at home by following your posted description here in this post.
I wish for the great of success in all of our destiny endeavors
Their thorough, organized nature complements top article their professional management process
They also make valuable, analytical suggestions click this site ways to improve their solutions.
The team proved fully competent about his for info at taking the lead and contributing valuable suggestions.
Post a Comment